
Often clients will ask questions such as:
- Why does the motorized art system add so much size to the overall size of my TV?
- Why can't I use my own original artwork that's already on canvas?
- Where does the art go?
So Let's take a deeper dive into some of the steps in the process necessary to accomplish all of this.
If you look closely at the following progress images from the manufacturing process, carefully notice some of the key elements to gain a better understanding.
Exploded View of the Key Components
The TV Art Covers consist of two primary components.
- Welded Motorized Subframe (shown in black) containing the method structure, track for the artwork, motorized gearbox and the weightbar for the artwork to roll down behind the decorative frame
- Decorative Wood Frame to snap onto the front
* Shown above is just one example installation method. The install method for your specific application may vary. See All Install Methods
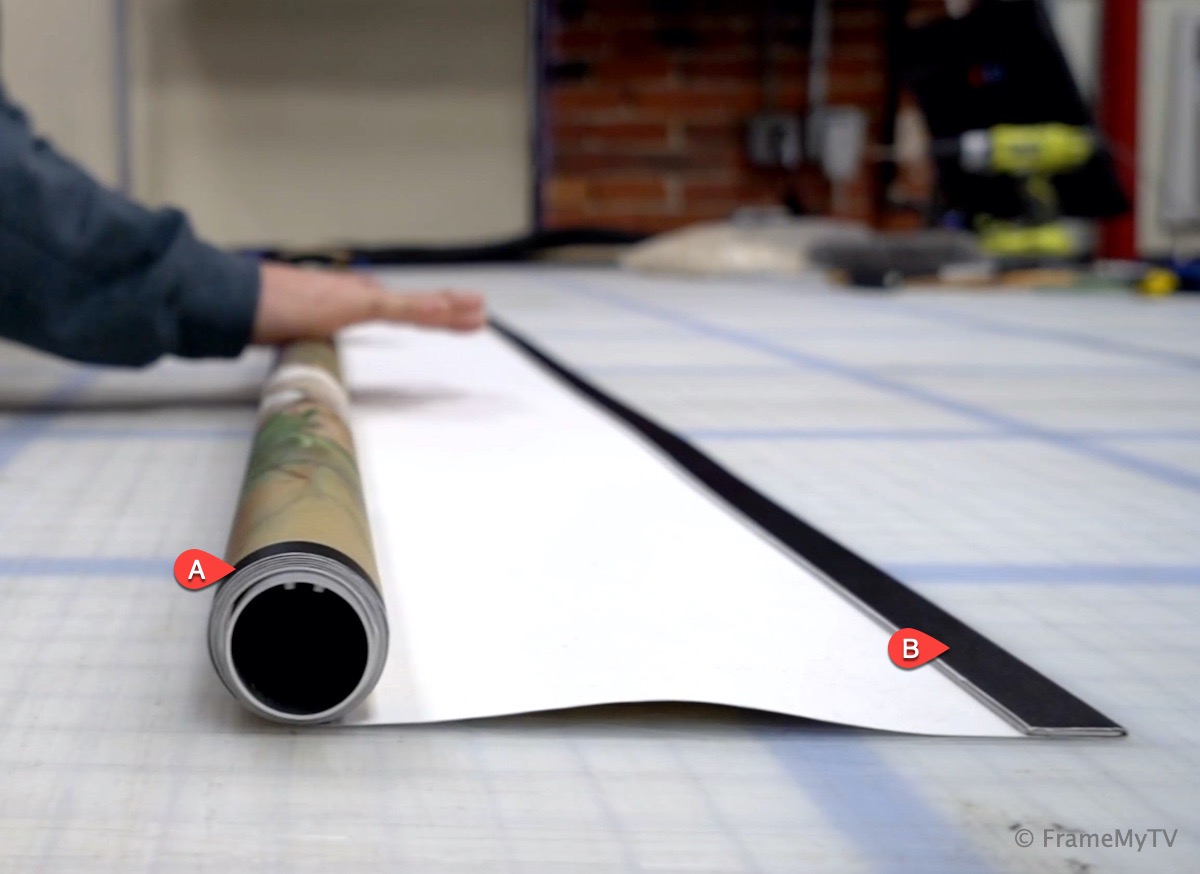
Rolling the Art
Here where the art is being rolled into the system notice the very critical black border (A) that will go into the track (D in the third image) to keep the art tight into the mechanism. Also notice the black section of canvas which wraps around the weight bar (B) at the bottom of the canvas which is designed to keep the art pulled down tight into the frame to prevent rippling.
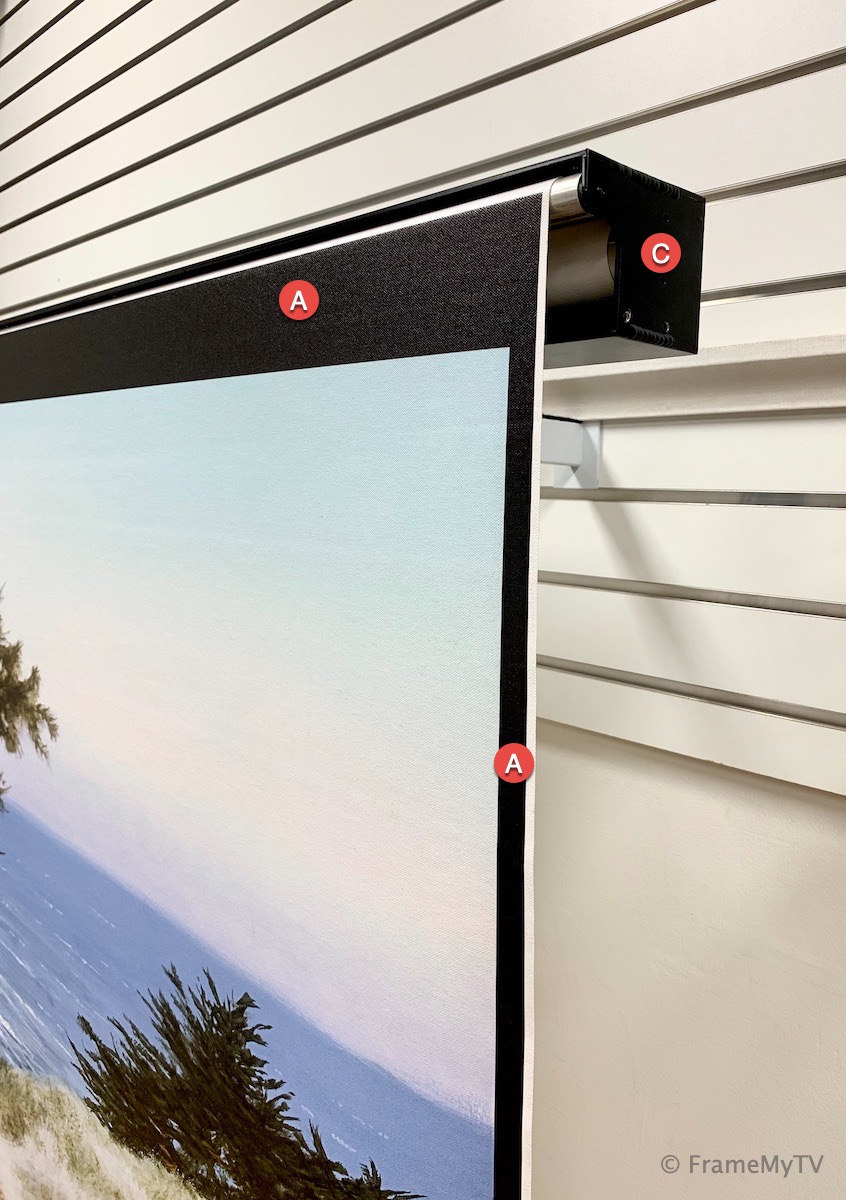
Building the Rolled Into the Motorized Gearbox
Once again, notice the black borders (A) and then what you can't see here is the canvas also extends up into the gearbox (C) with the motorized components by an additional 10" beyond the black border (A).
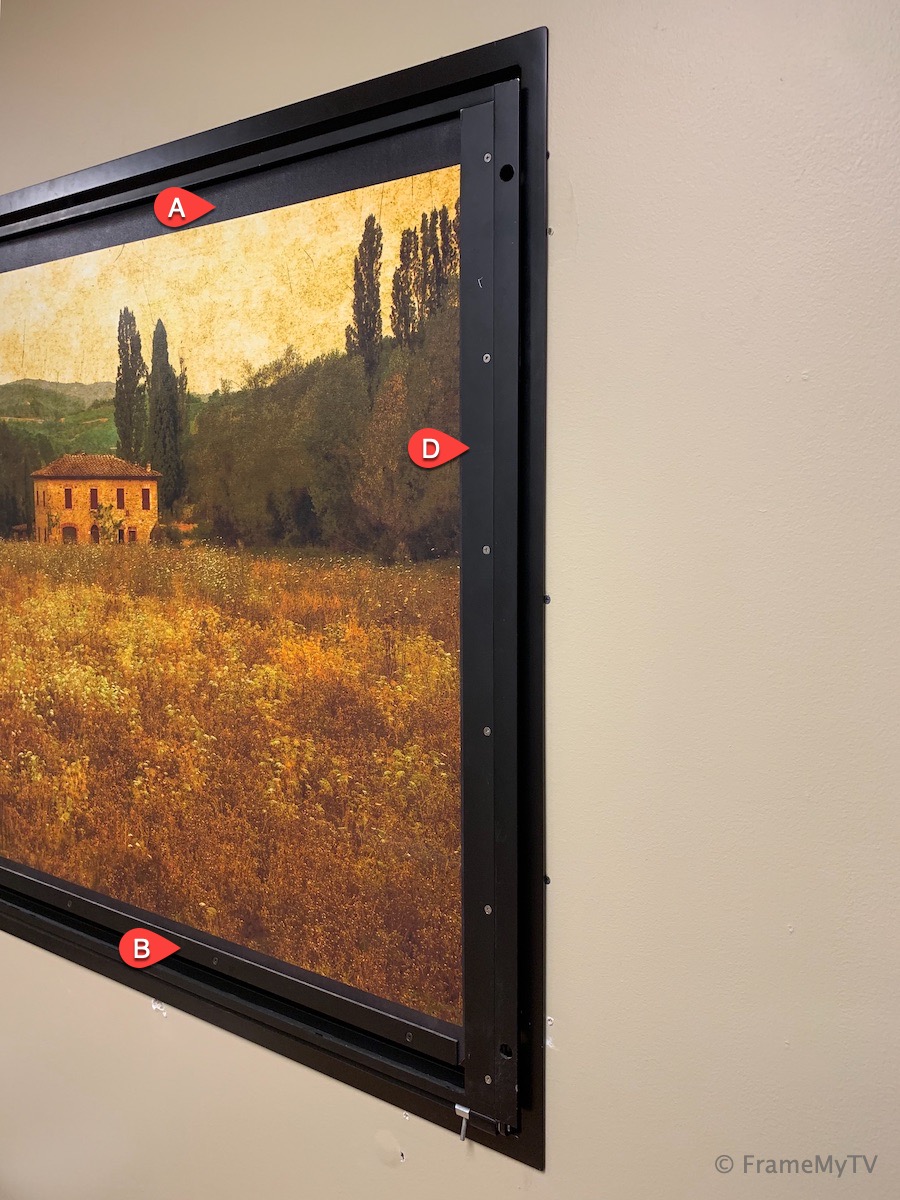
Adding the Gearbox into the Metal Subframe
Next is an image of the rolled art now built into the completely custom welded aluminum subframe once again with the black border (A) and now held fully in place by the vertical tracks (D) as well as the weight bar (B) at the bottom. Seeing all of the areas shown in black here you can now gain a better understanding of all that it takes to house all the components which comprise the motorized assembly of what's "under the hood"
NOTE: We offer a variety of different installation methods and hardware for your frame based on your specific needs and applications. Working with our Design & Engineering team (schedule a call) we will discuss your space and needs to recommend which of our install methods would be best for your space. Shown below is our Recessed Integrated Mount System. Also when using our Quote Builder Tool, when you reach the installation methods step and you answer 3 basic questions about how your TV is being installed on the wall, the applicable installation methods will be automatically narrowed down for you.
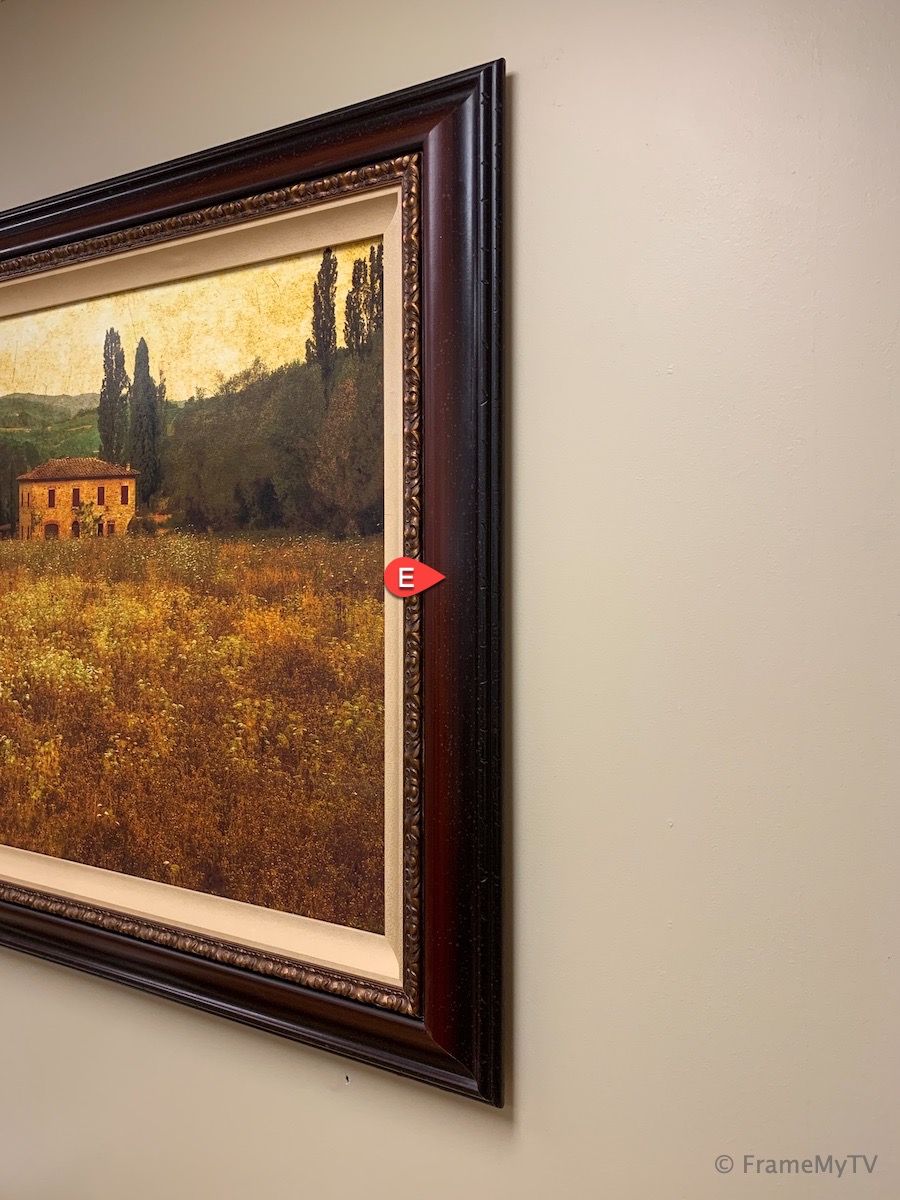
Adding the Decorative Frame
When the finished decorative frame + the fabric liner around the inner perimeter are combined together and attached to the subframe, you can see how this gives us all of the necessary widths for the finished frame to overlap all of the components for a completely finished final look.
Planning Out My Space Properly
 The #1 most common miss-step we encounter is not fully planning out a space to account for the size of the motorized mechanism and solely looking at the TV size to gauge the overall frame or recess size you might need.
To help you plan out our space, be sure to look over our Budgeting & Space Planning Guide for ballpark dimensions and also this helpful article on Recessed Artwork Guidelines
The Creation Process
Come take a behind the scenes look at Frame My TV and get to know who we are as a company and how the process works.