
This installation method is designed generally for TV's 46" and larger with the use of an articulating swing arm type of mount where the objective is to have the weight of the frame supported by the wall mount.
Tools Required:
- Power Drill
- Level
- Wall Mount for the television (customer supplied)
NOTE: This mounting method does not replace the need for a wall mount for hte TV. This is purely an adapter plate for your wall mount.
If using one of our Infrared Relay Systems with your frame, you will want to install the IR Unit before installing the frame.
- IR-2 Instructions: Click here to download
WARNING: If you have any questions or concerns about the installation process of any of our products, DO NOT PROCEED! Contact 978-912-7200 before proceeding. Failure to properly install this system may result in serious injury or death.
Be sure to also review the information provided by your TV manufacturer and the supplier of the TV's wall mount to ensure the weight ratings and limitations of any devices directly associated by the installation of this product.
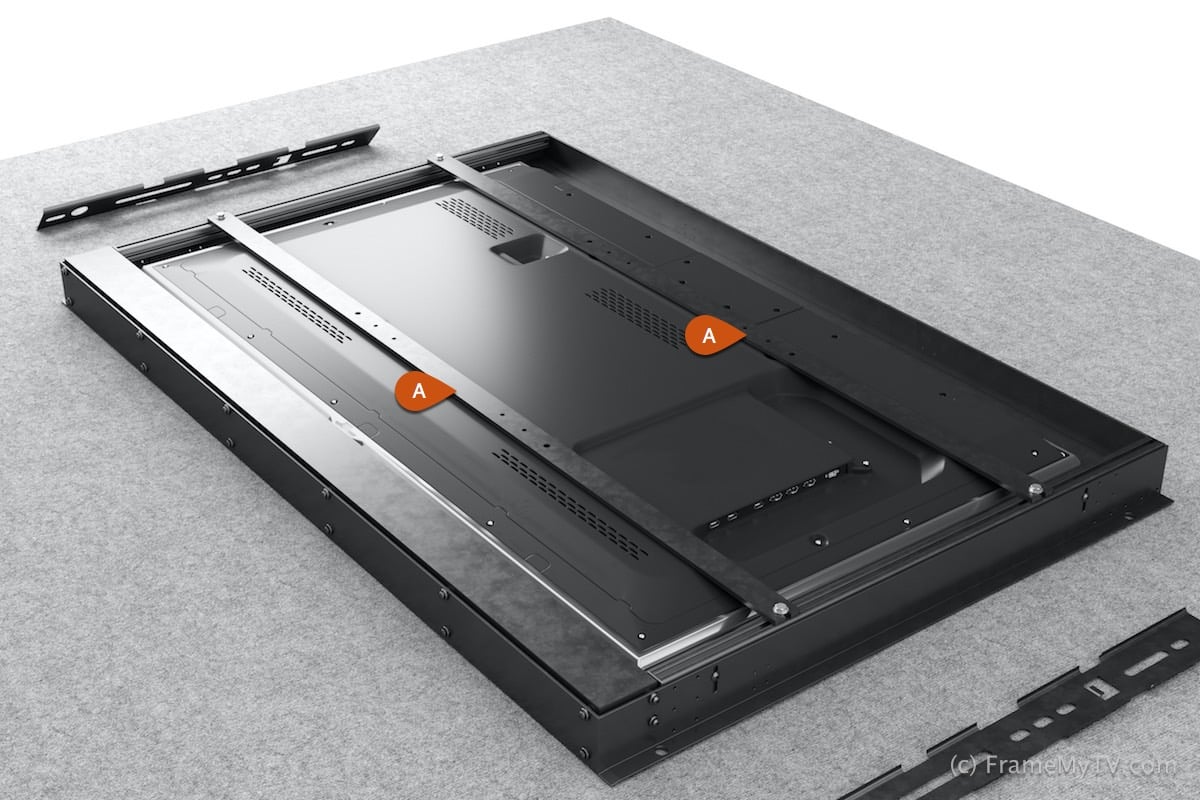
Instruction Steps1) Lay the black motorized metal subframe on it's face on a carpeted or soft surface.
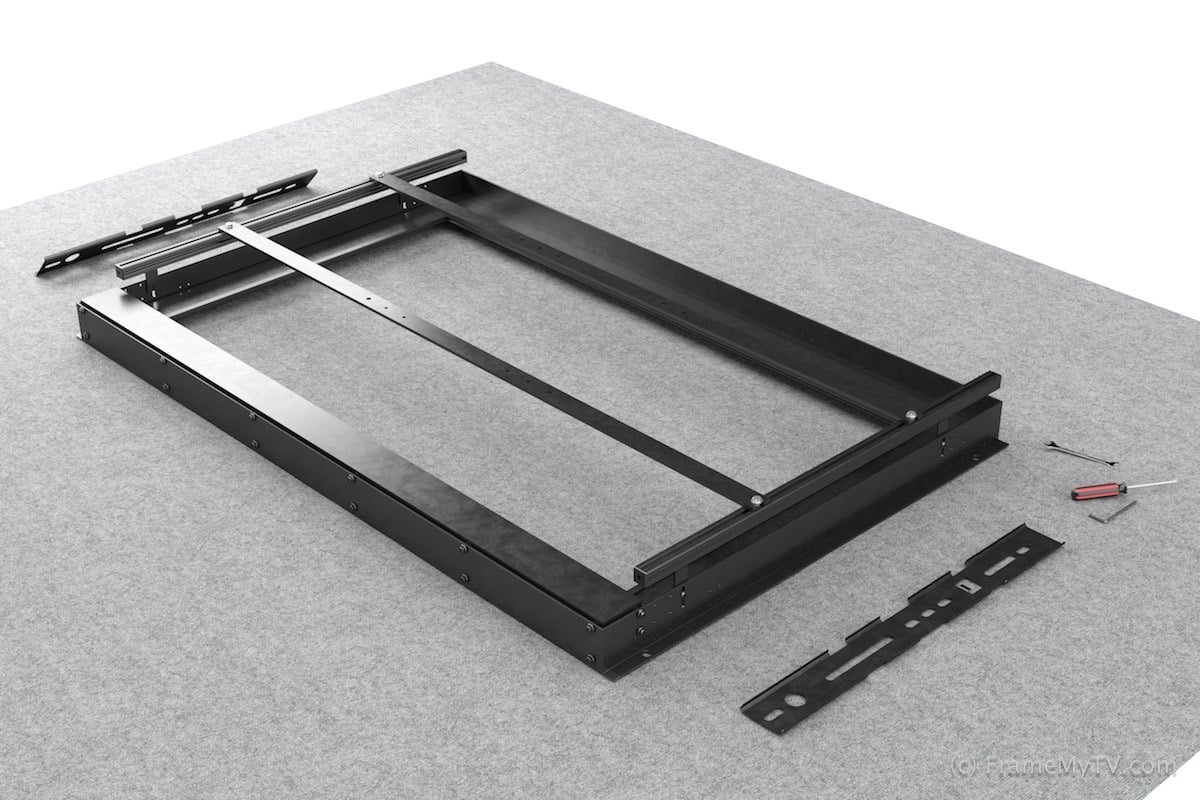
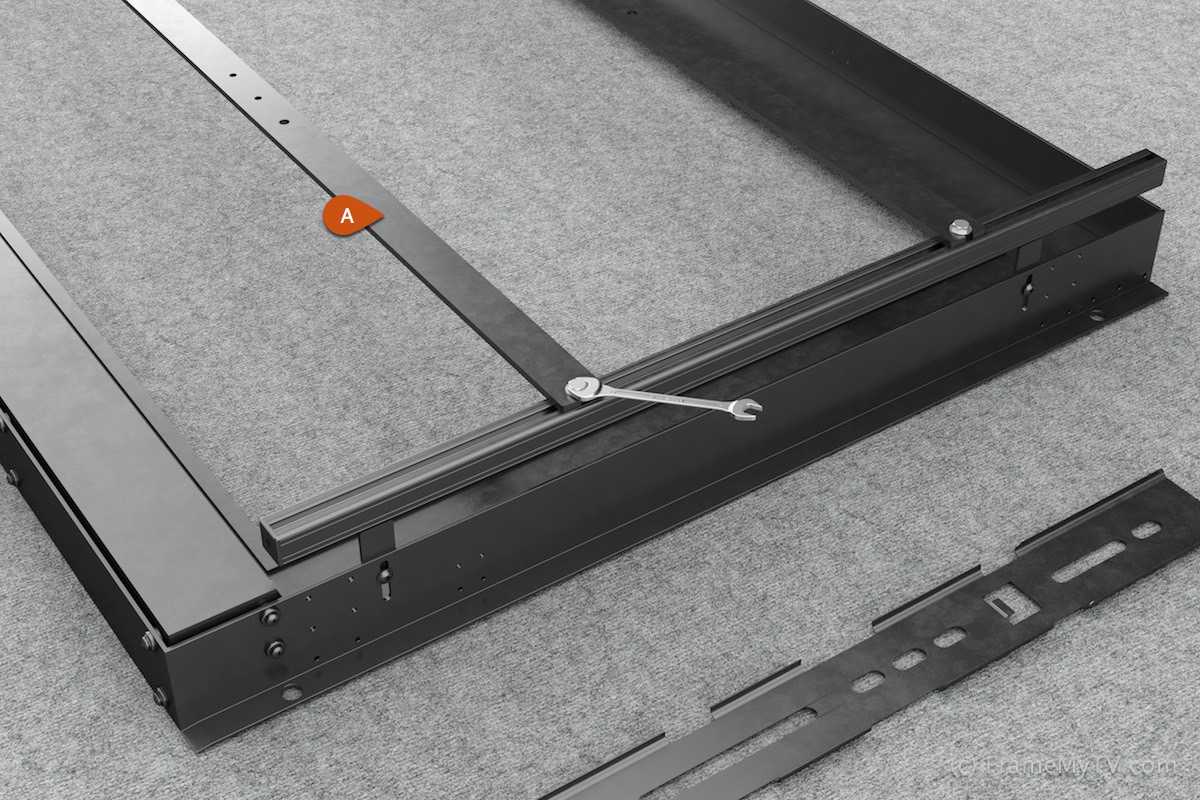
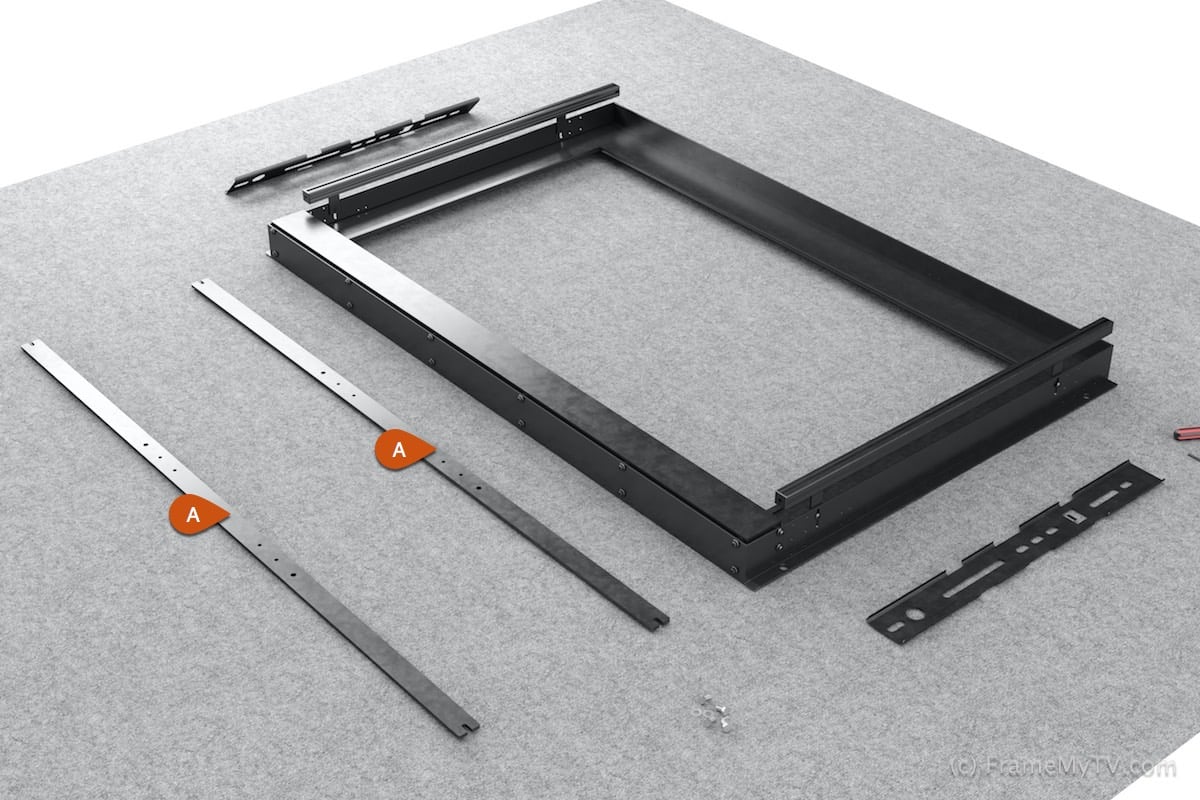
2) Remove the horizontal rails (A) as shown.
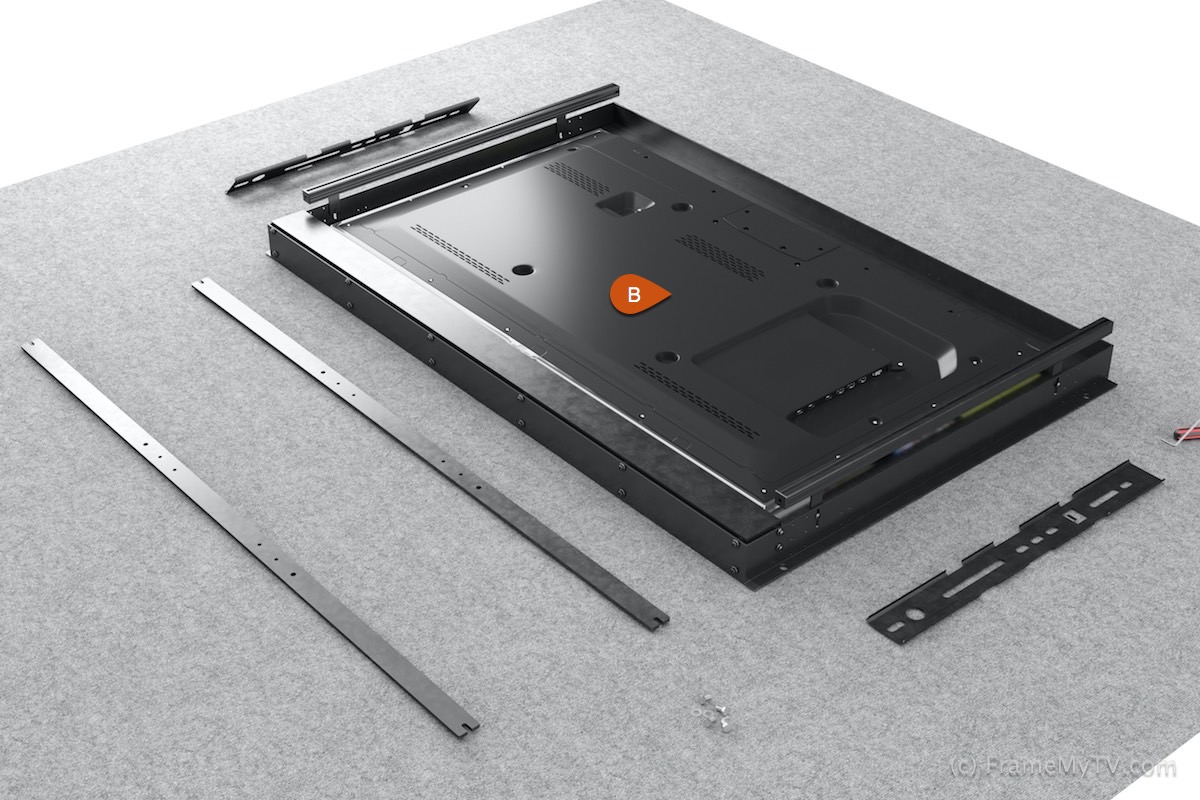
3) Place the TV face down (B) into the metal subframe so that the visible TV screen is aligned with the opening of the black mat in the subframe
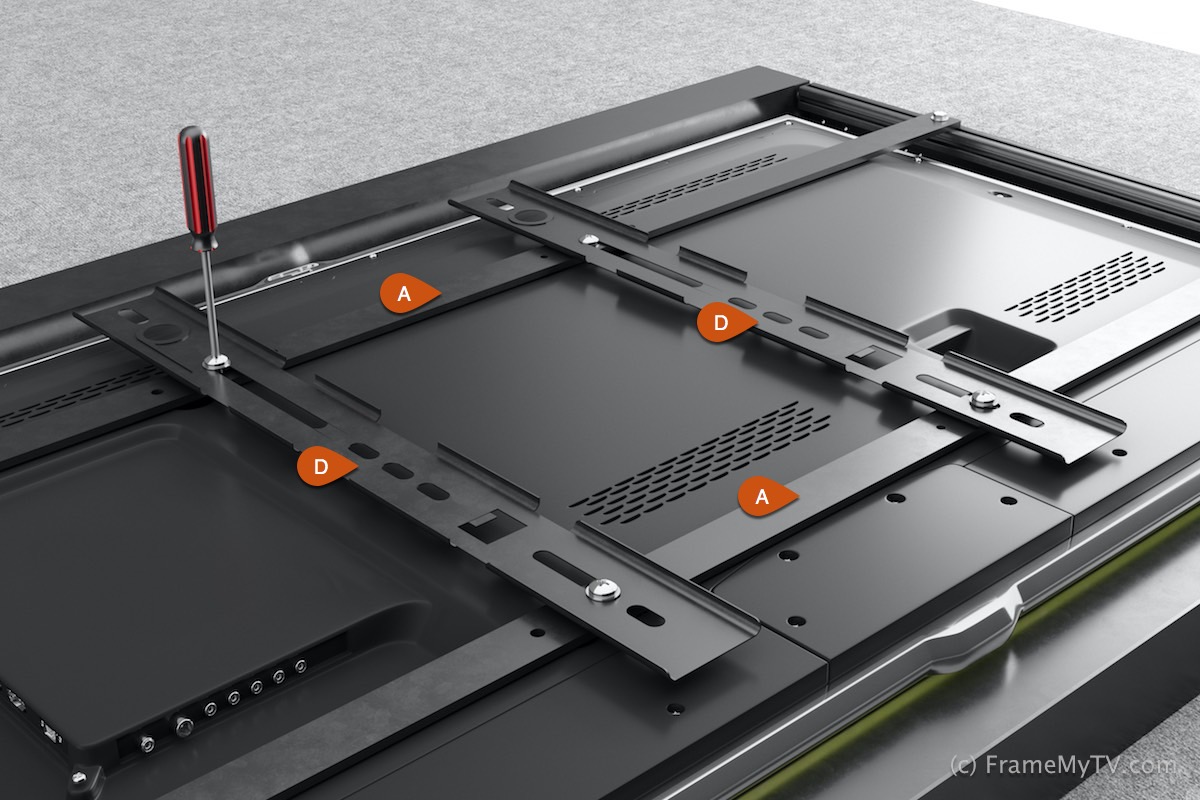
4) Re-Install the horizontal rails (A) and slide them to align the horizontal rails with the VESA mounting holes on the back of the TV.
5) If you need to adjust the depth of the tracks for the horizontal rails (A) to be tight to the back of the TV, loosen the hex adjustment screw shown (C) here on the side then re-tighten.

6) Install the vertical rails (D) that came with your TV's wall mount onto the horizontal (A) rails that you just re-installed as shown.
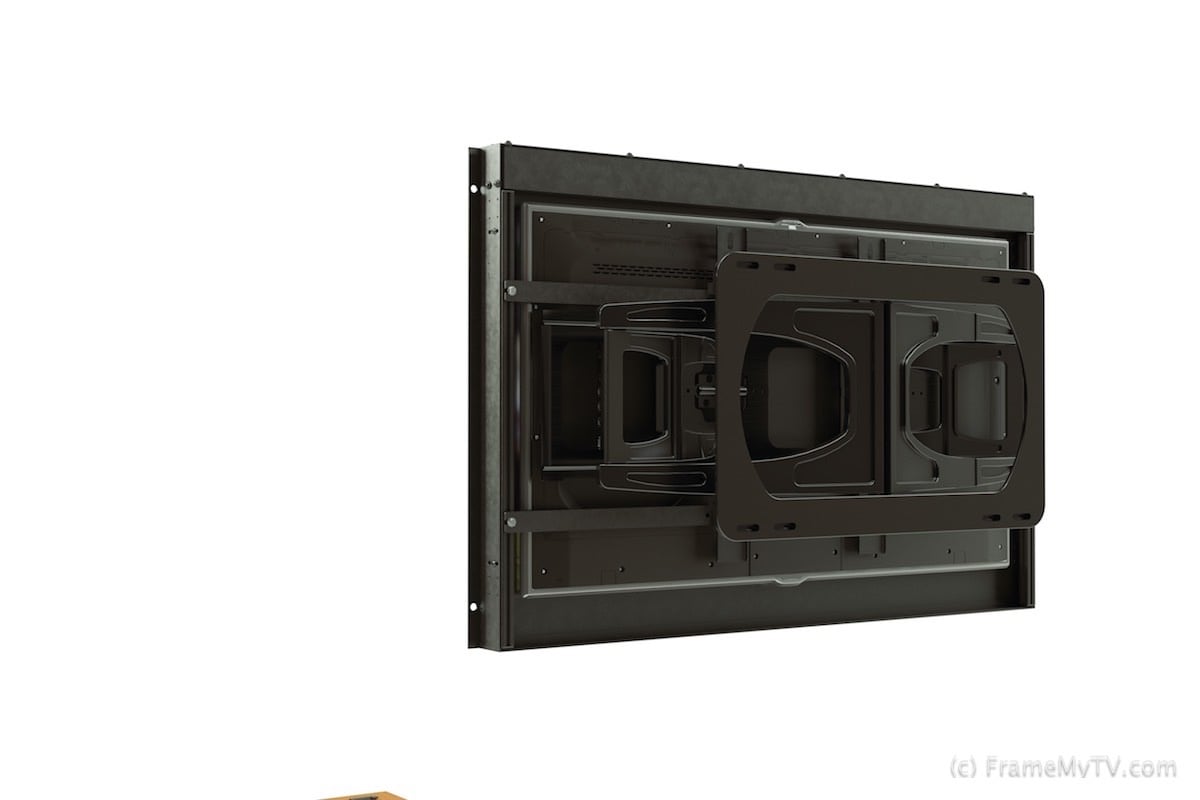
7) Lift the entire motorized art subframe + TV assembly up and hang it onto the TV's wall mount.
8) Using the black hooks (E) at the top of the decorative frame, hook the frame onto the top of the metal subframe.
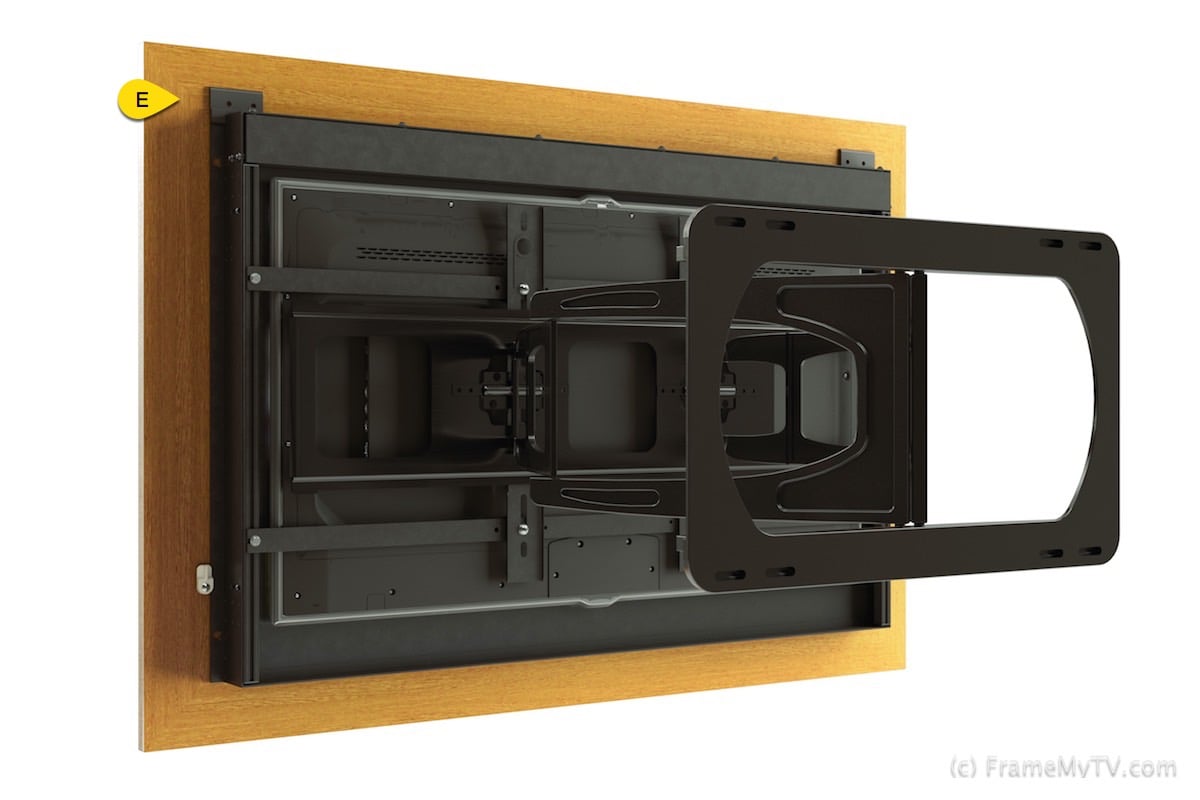
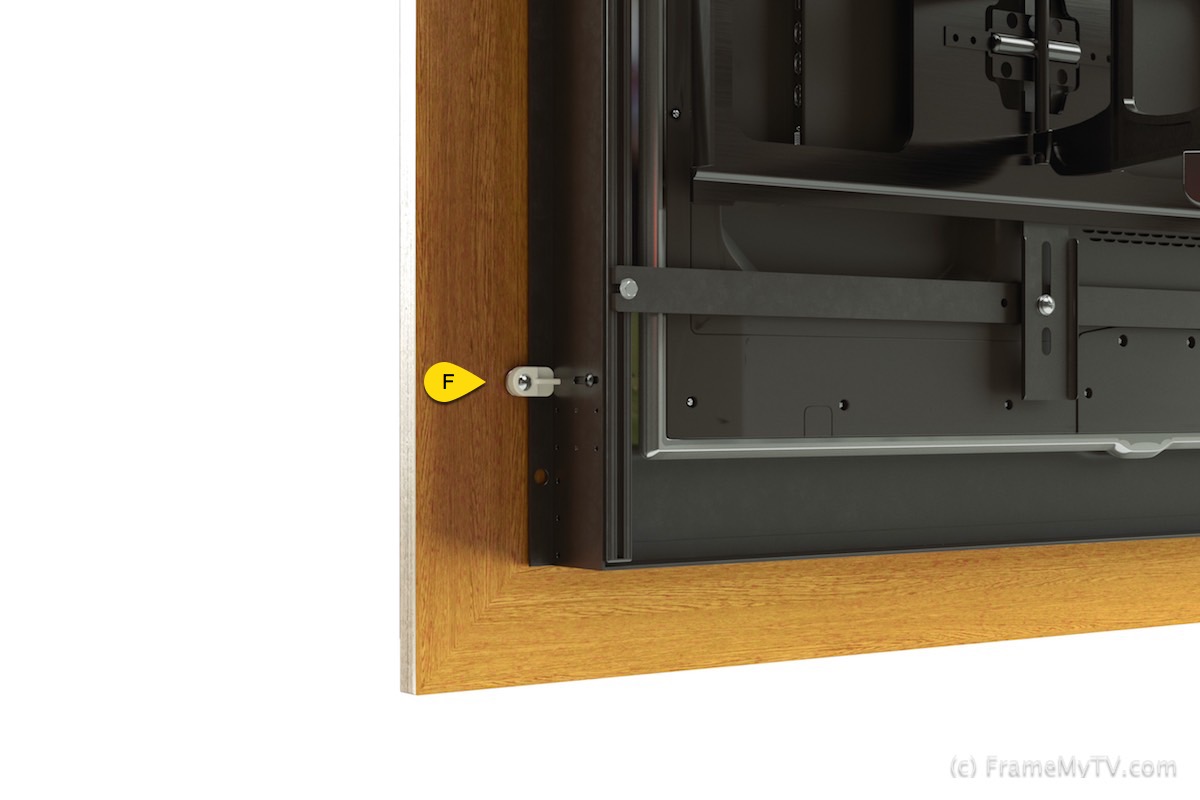
9) Rotate the white turn button (F) at the bottom of the decorative frame to secure it to the black metal subframe.
10) Enjoy and take some great photos of the final installed product for your chance both win great prizes and be featured in the next issue of our Designers Inspiration Guidebook. CLICK HERE to Submit Your Photos