Restoration Hardware TV Easel with Samsung The Frame
Check out how a Deco TV Frame can be combined with a TV easel by Restoration Hardware & Samsung The Frame
This How To Article was written by one of our clients and submitted to us to republish
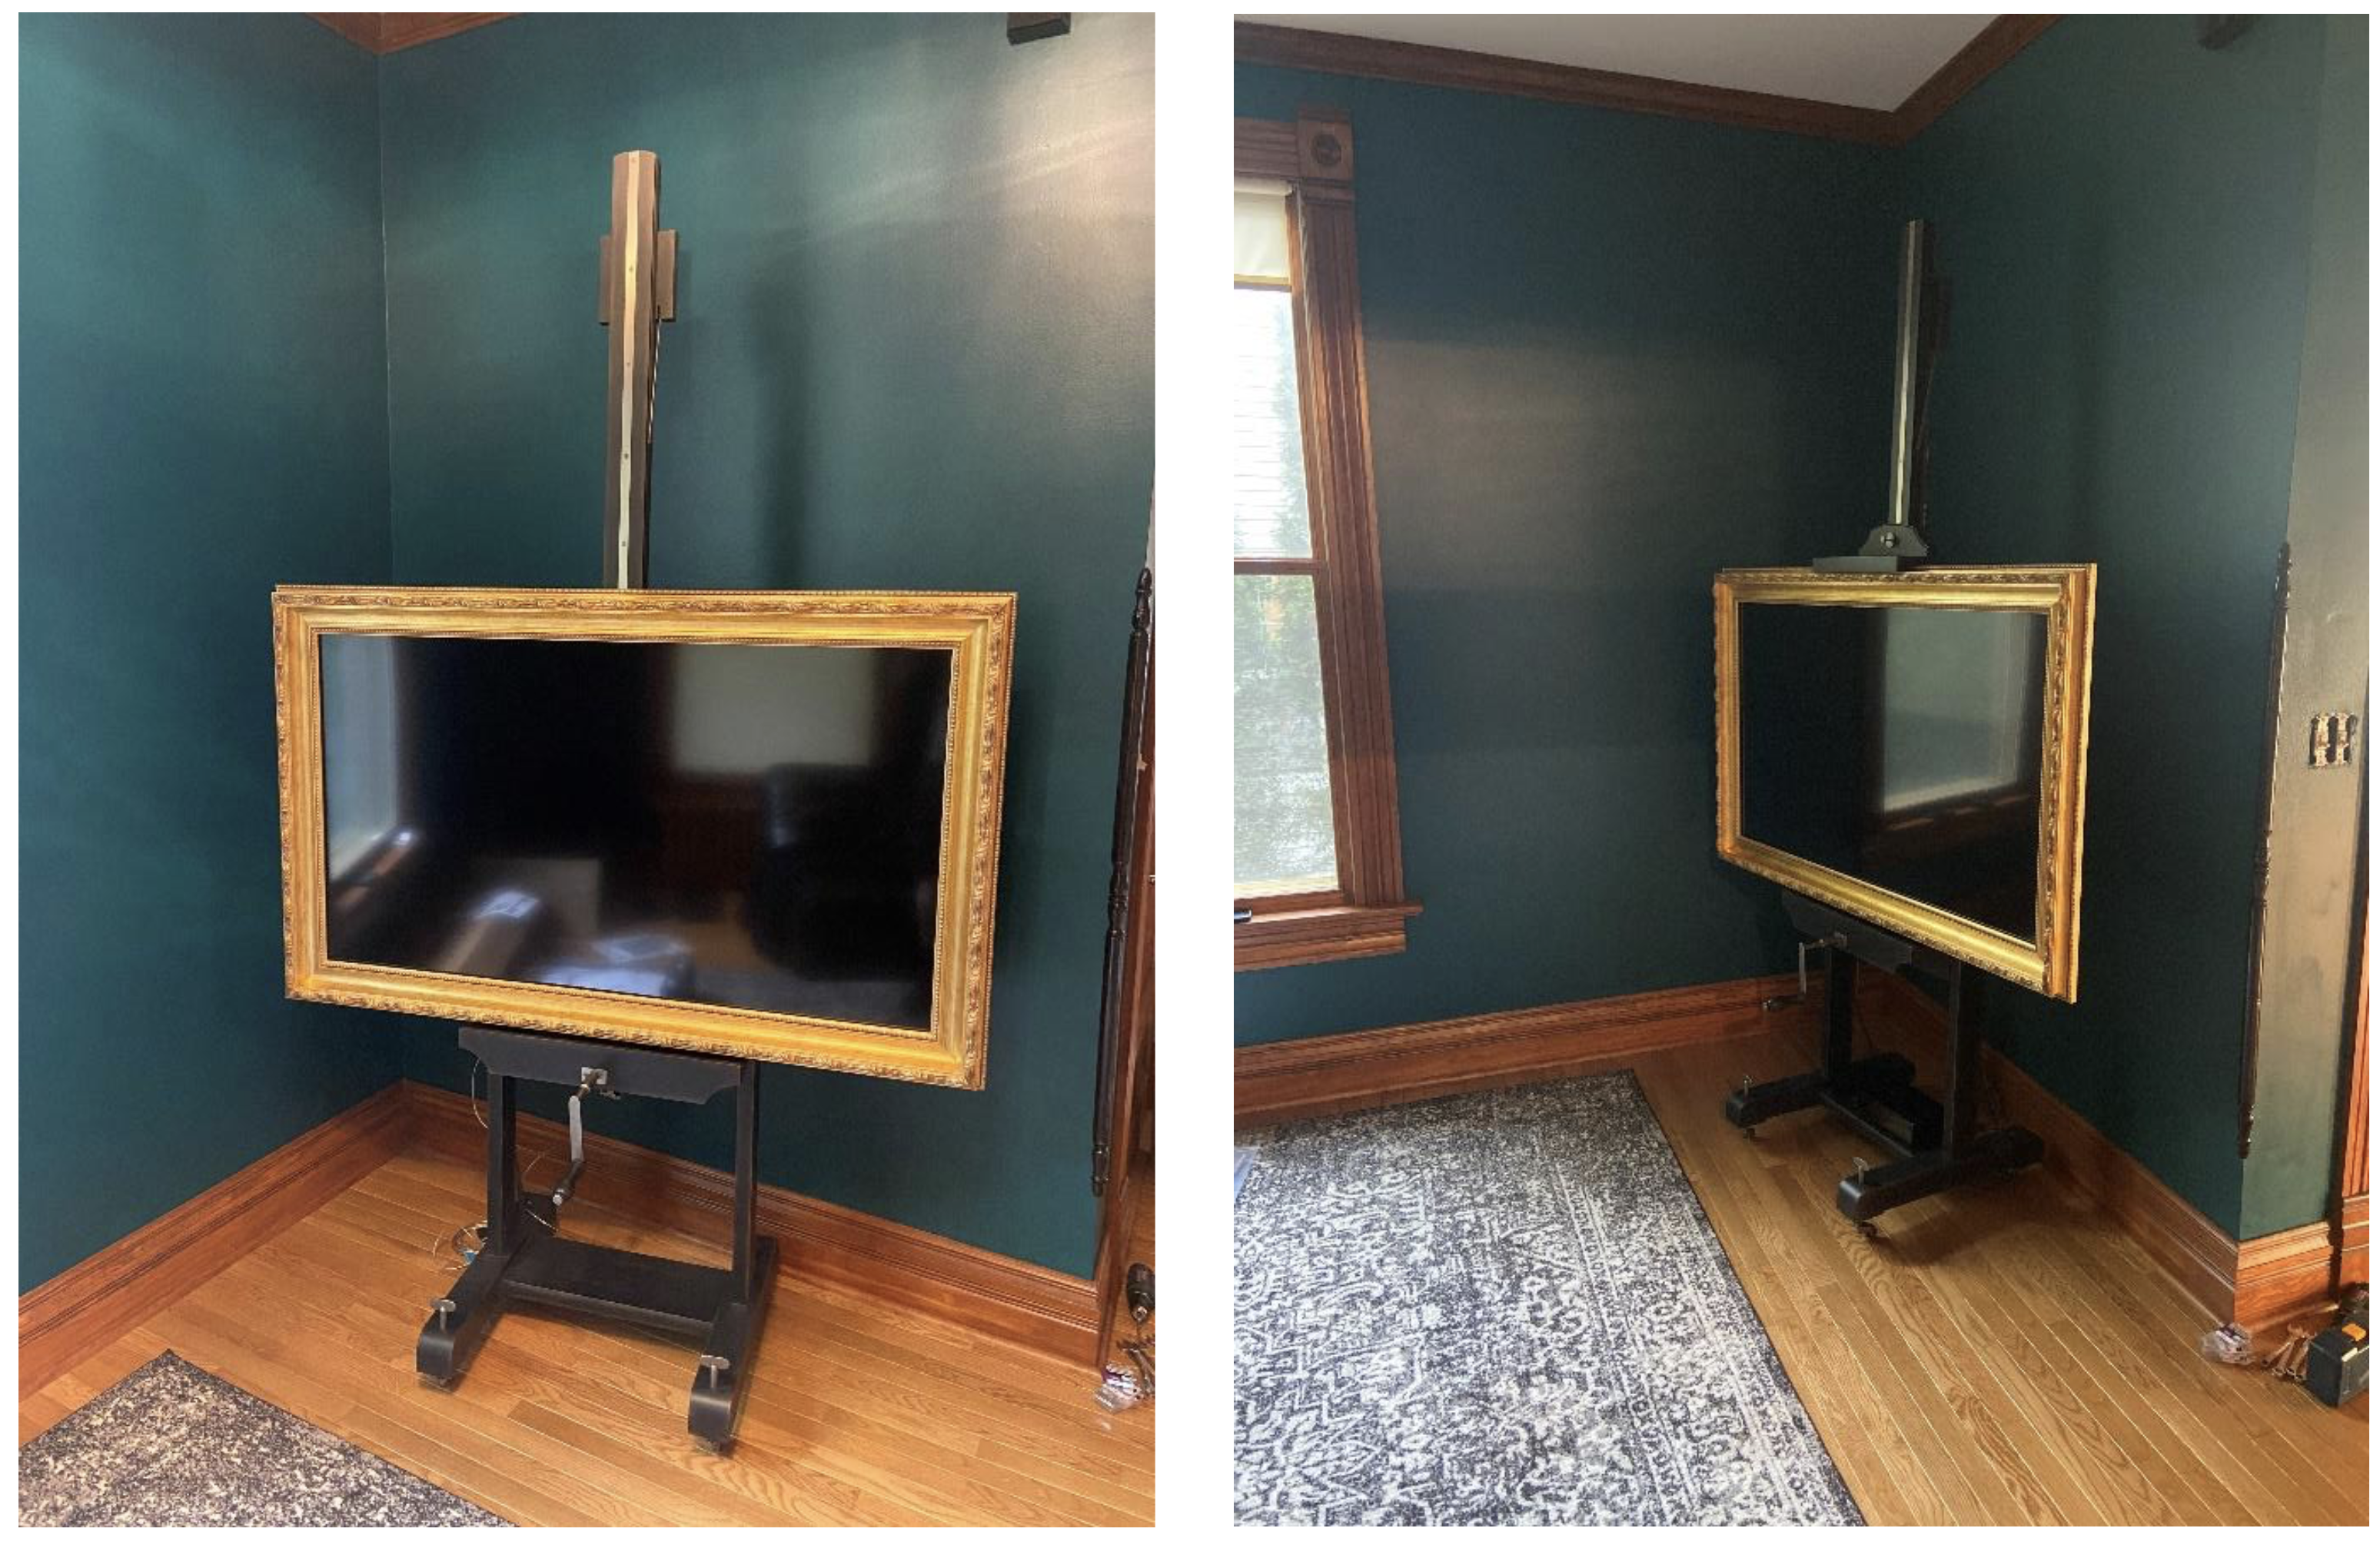
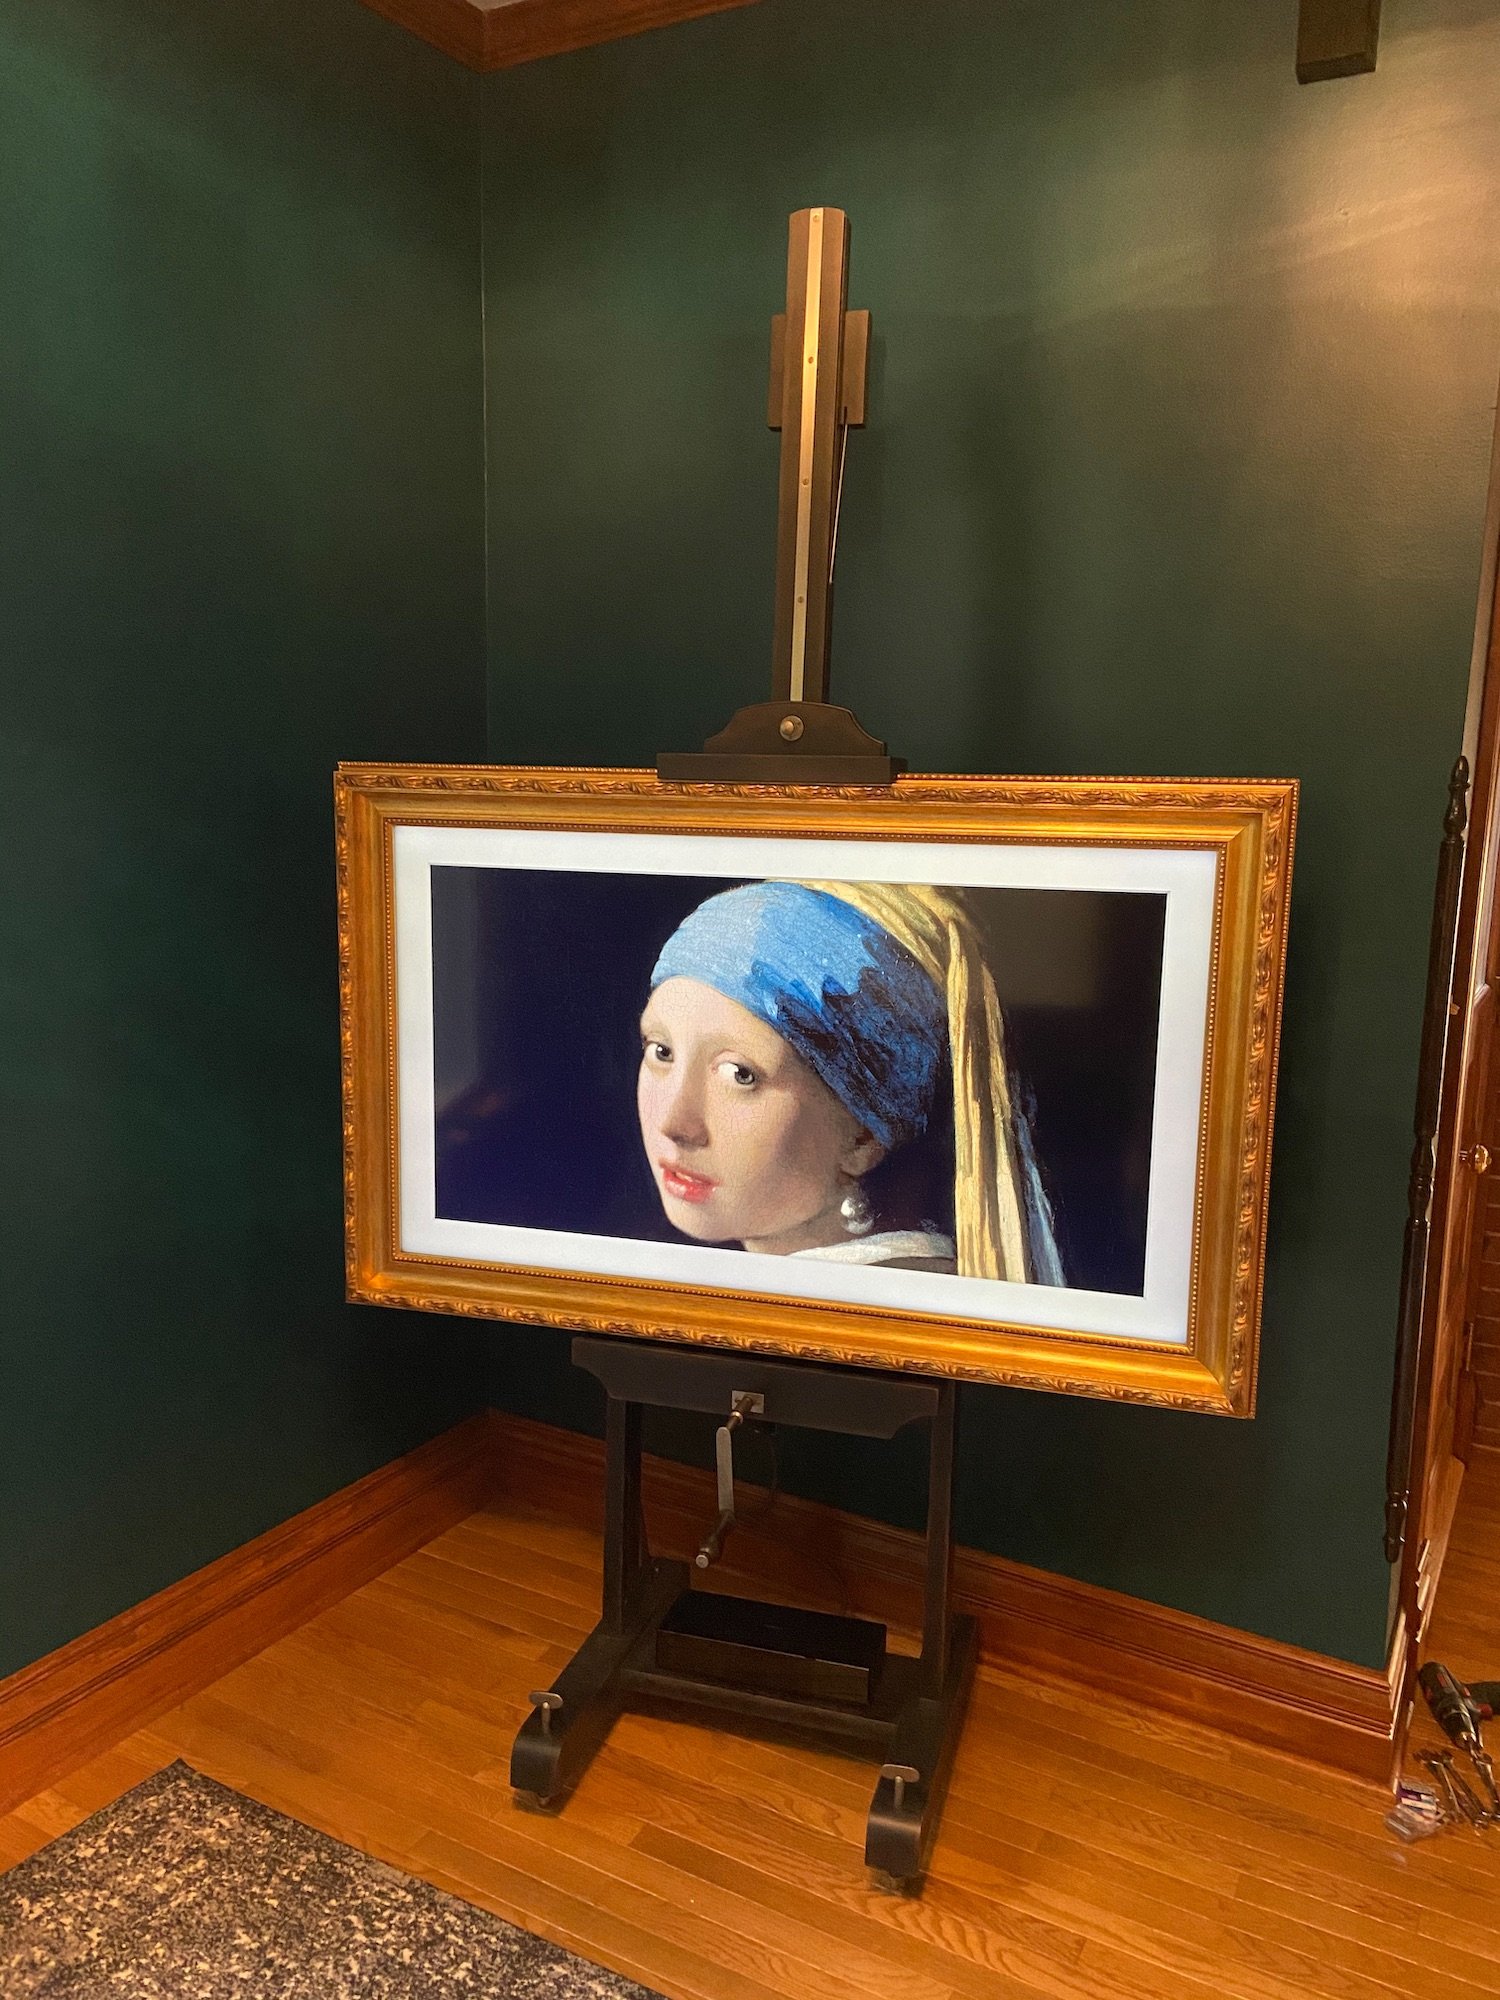
Hard to believe this is a Samsung Frame TV right ??
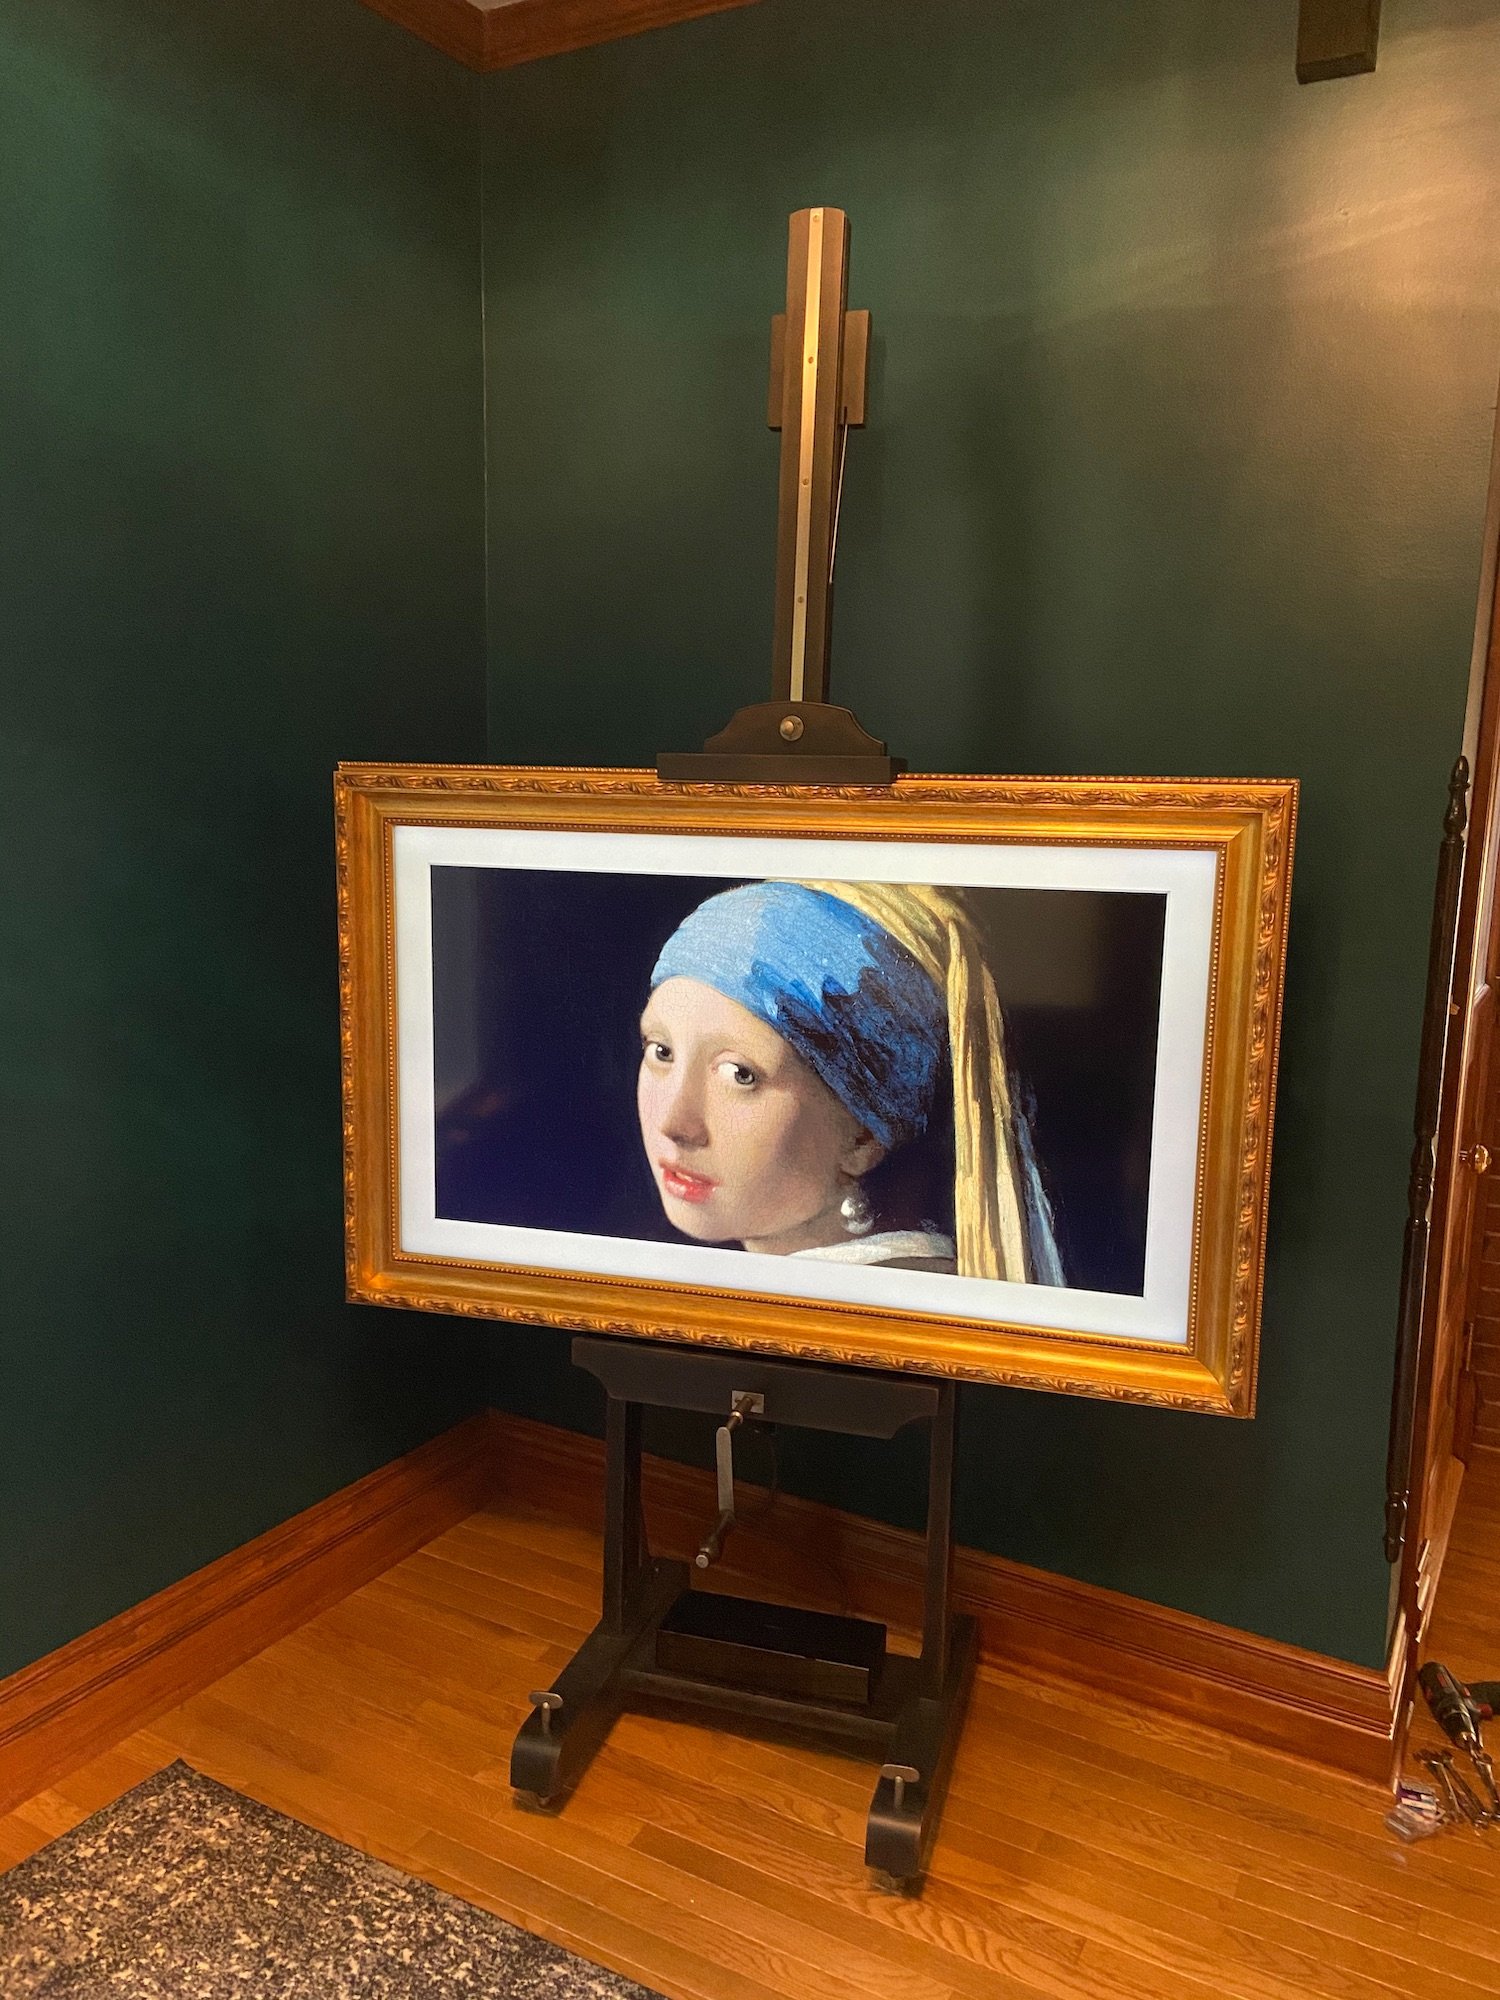
Shown above is a:
- RH (Restoration Hardware) 19th C. English Artist’s (TV) Easel
- Samsung The Frame TV
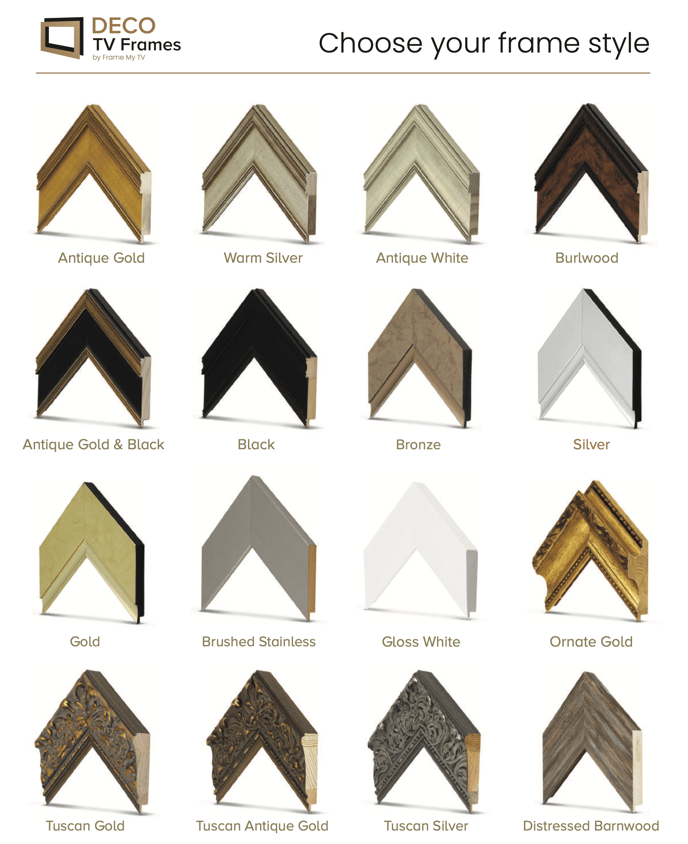
- Ornate Gold Deco TV Frame
Tutorials on Samsung The Frame
 We regularly publish new videos about Samsung The Frame TVs to answer many FAQs to help you get the most of your TV. Be sure to subscribe to our channel to learn more.
Our Client Writes:
"We wanted a discrete TV in our home. We wanted a TV that could seemingly disappear in plain sight. We wanted a combination of items that would be aesthetically pleasing in our home even when not in use. That led to the idea of combining an RH TV Easel with a Samsung ‘The Frame’ TV and fully completing the look with an ornate gold frame by DECO TV Frames. The result has drawn countless compliments from “jaw-dropping” to “amazing” to “absolutely stunning.”
The following steps show how I was able to securely mount the TV to the easel, leaving enough room to install the DECO TV Frame.
In brief, I mounted a board to the easel, secured the mounting bracket included with the Samsung The Frame to the board, hung the TV on the bracket, secured the DECO TV Frame, stood back and smiled."
Steps to Accomplish This
Step 1: Supplies used
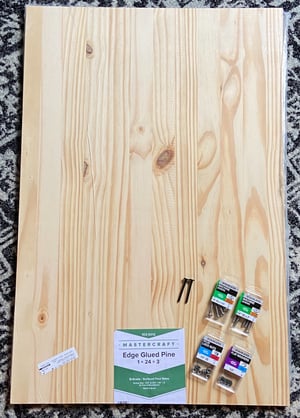
- (1) Piece of wood (we used a 2’ x 3’ piece of edge glued pine; width of wood remained 2’; height of wood was reduced in order to not be taller than the overall height of the DECO TV Frame which was 34- 1/8” in our case)
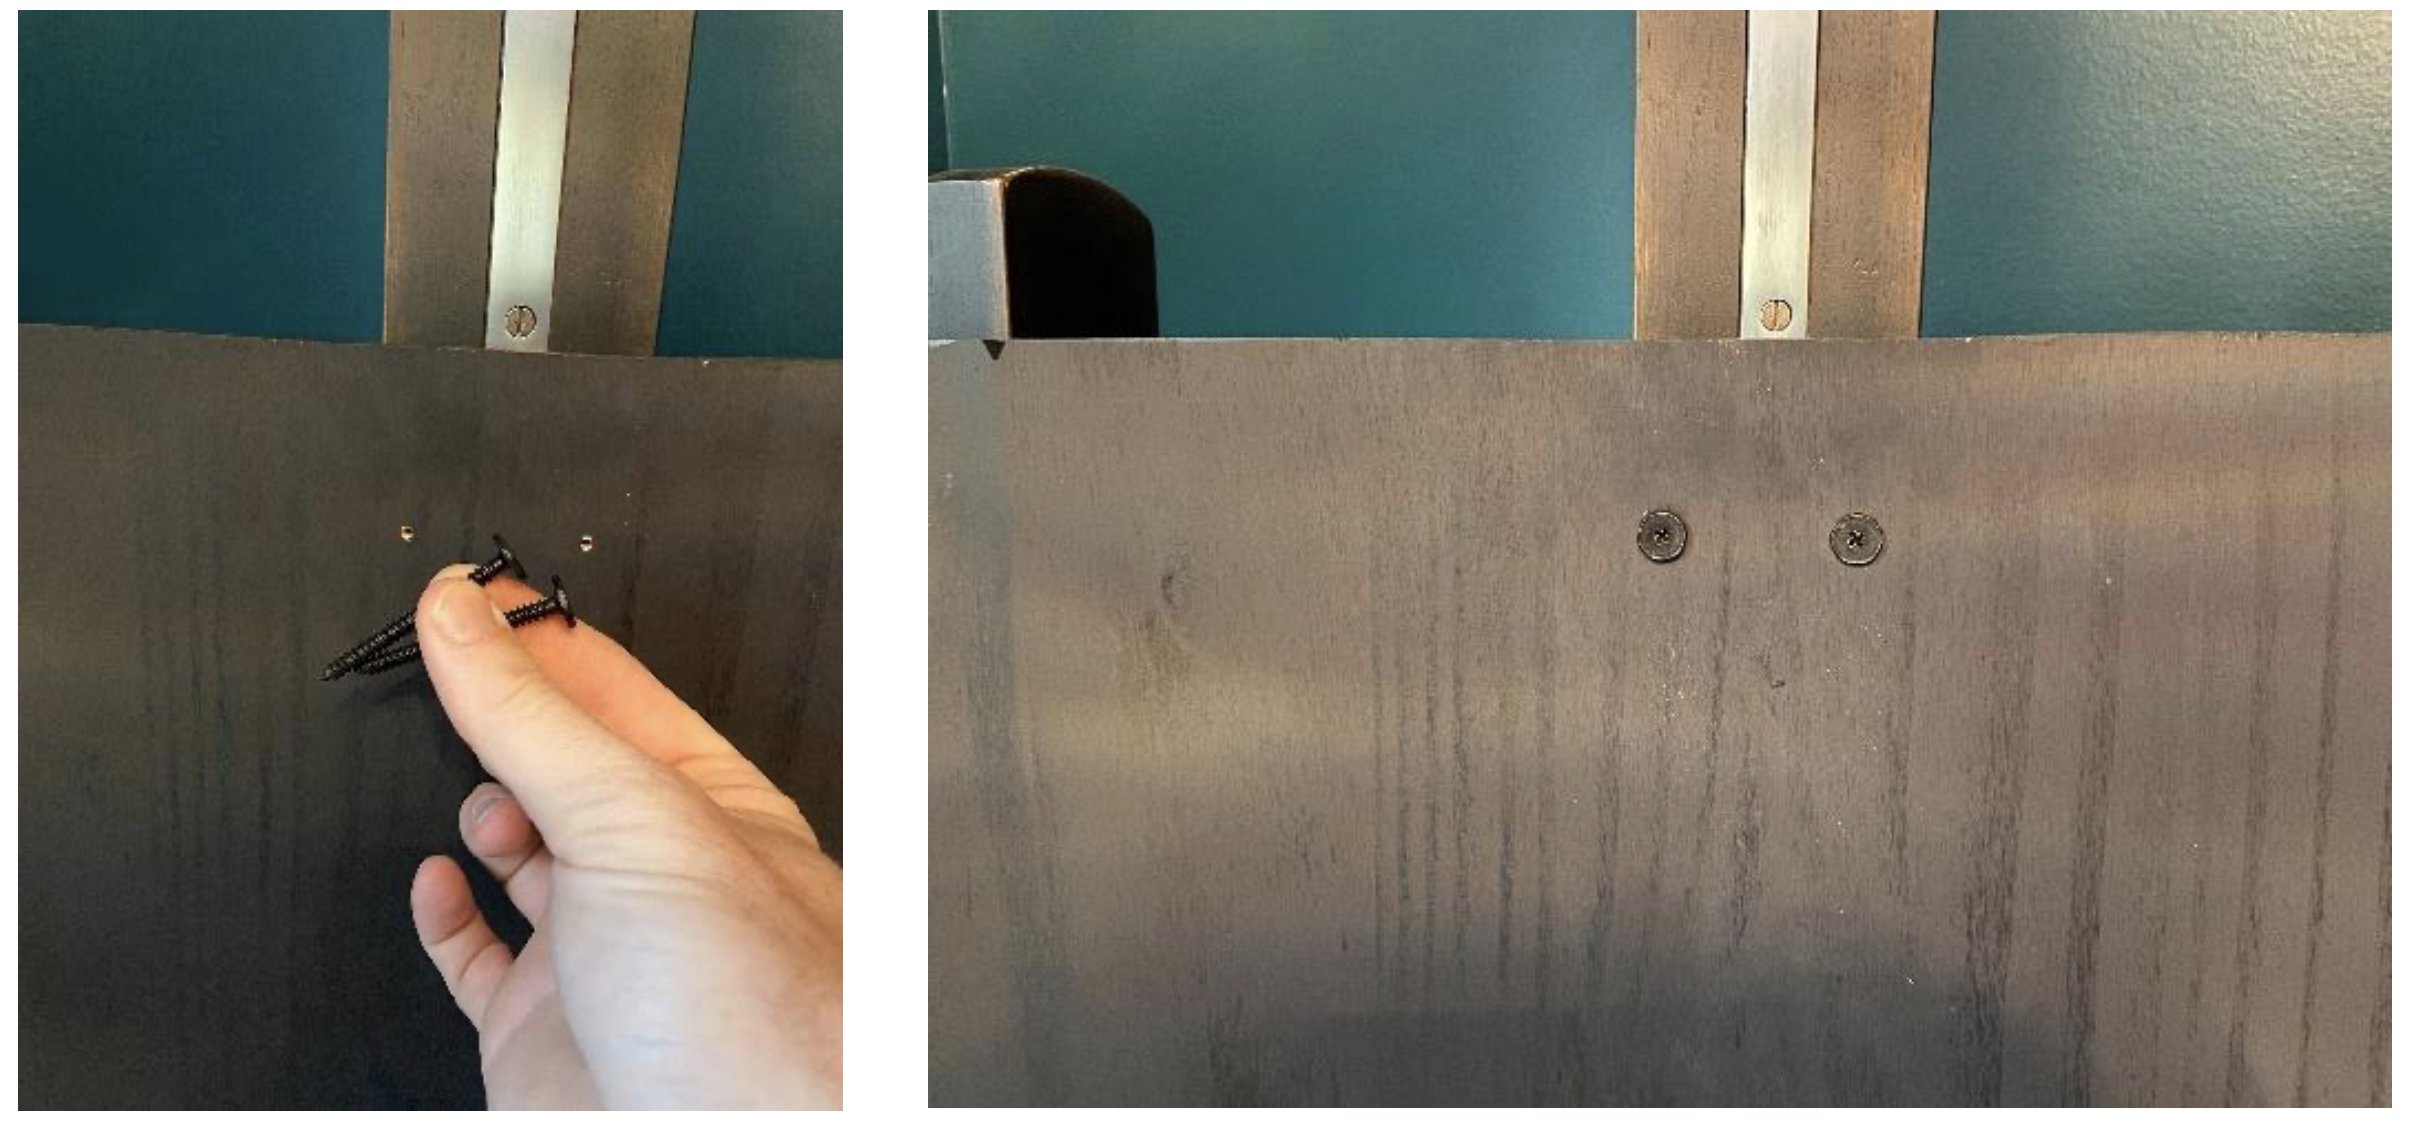
- (2) Screws included with Samsung The Frame mounting bracket→Used to secure top of board to easel - (2) Machine screws with pan head (1/4” -20 x 2”)→Used to secure bottom of board to easel
- (4) Machine screws with pan head (1/4” -20 x 1-1/4”) → Used to secure mounting bracket to board
- (6) Flat washers (1/4”)
- (6) Nylon lock nuts (1/4” -20)
Note: Washers were used on back side of easel before lock nuts
Step 2:
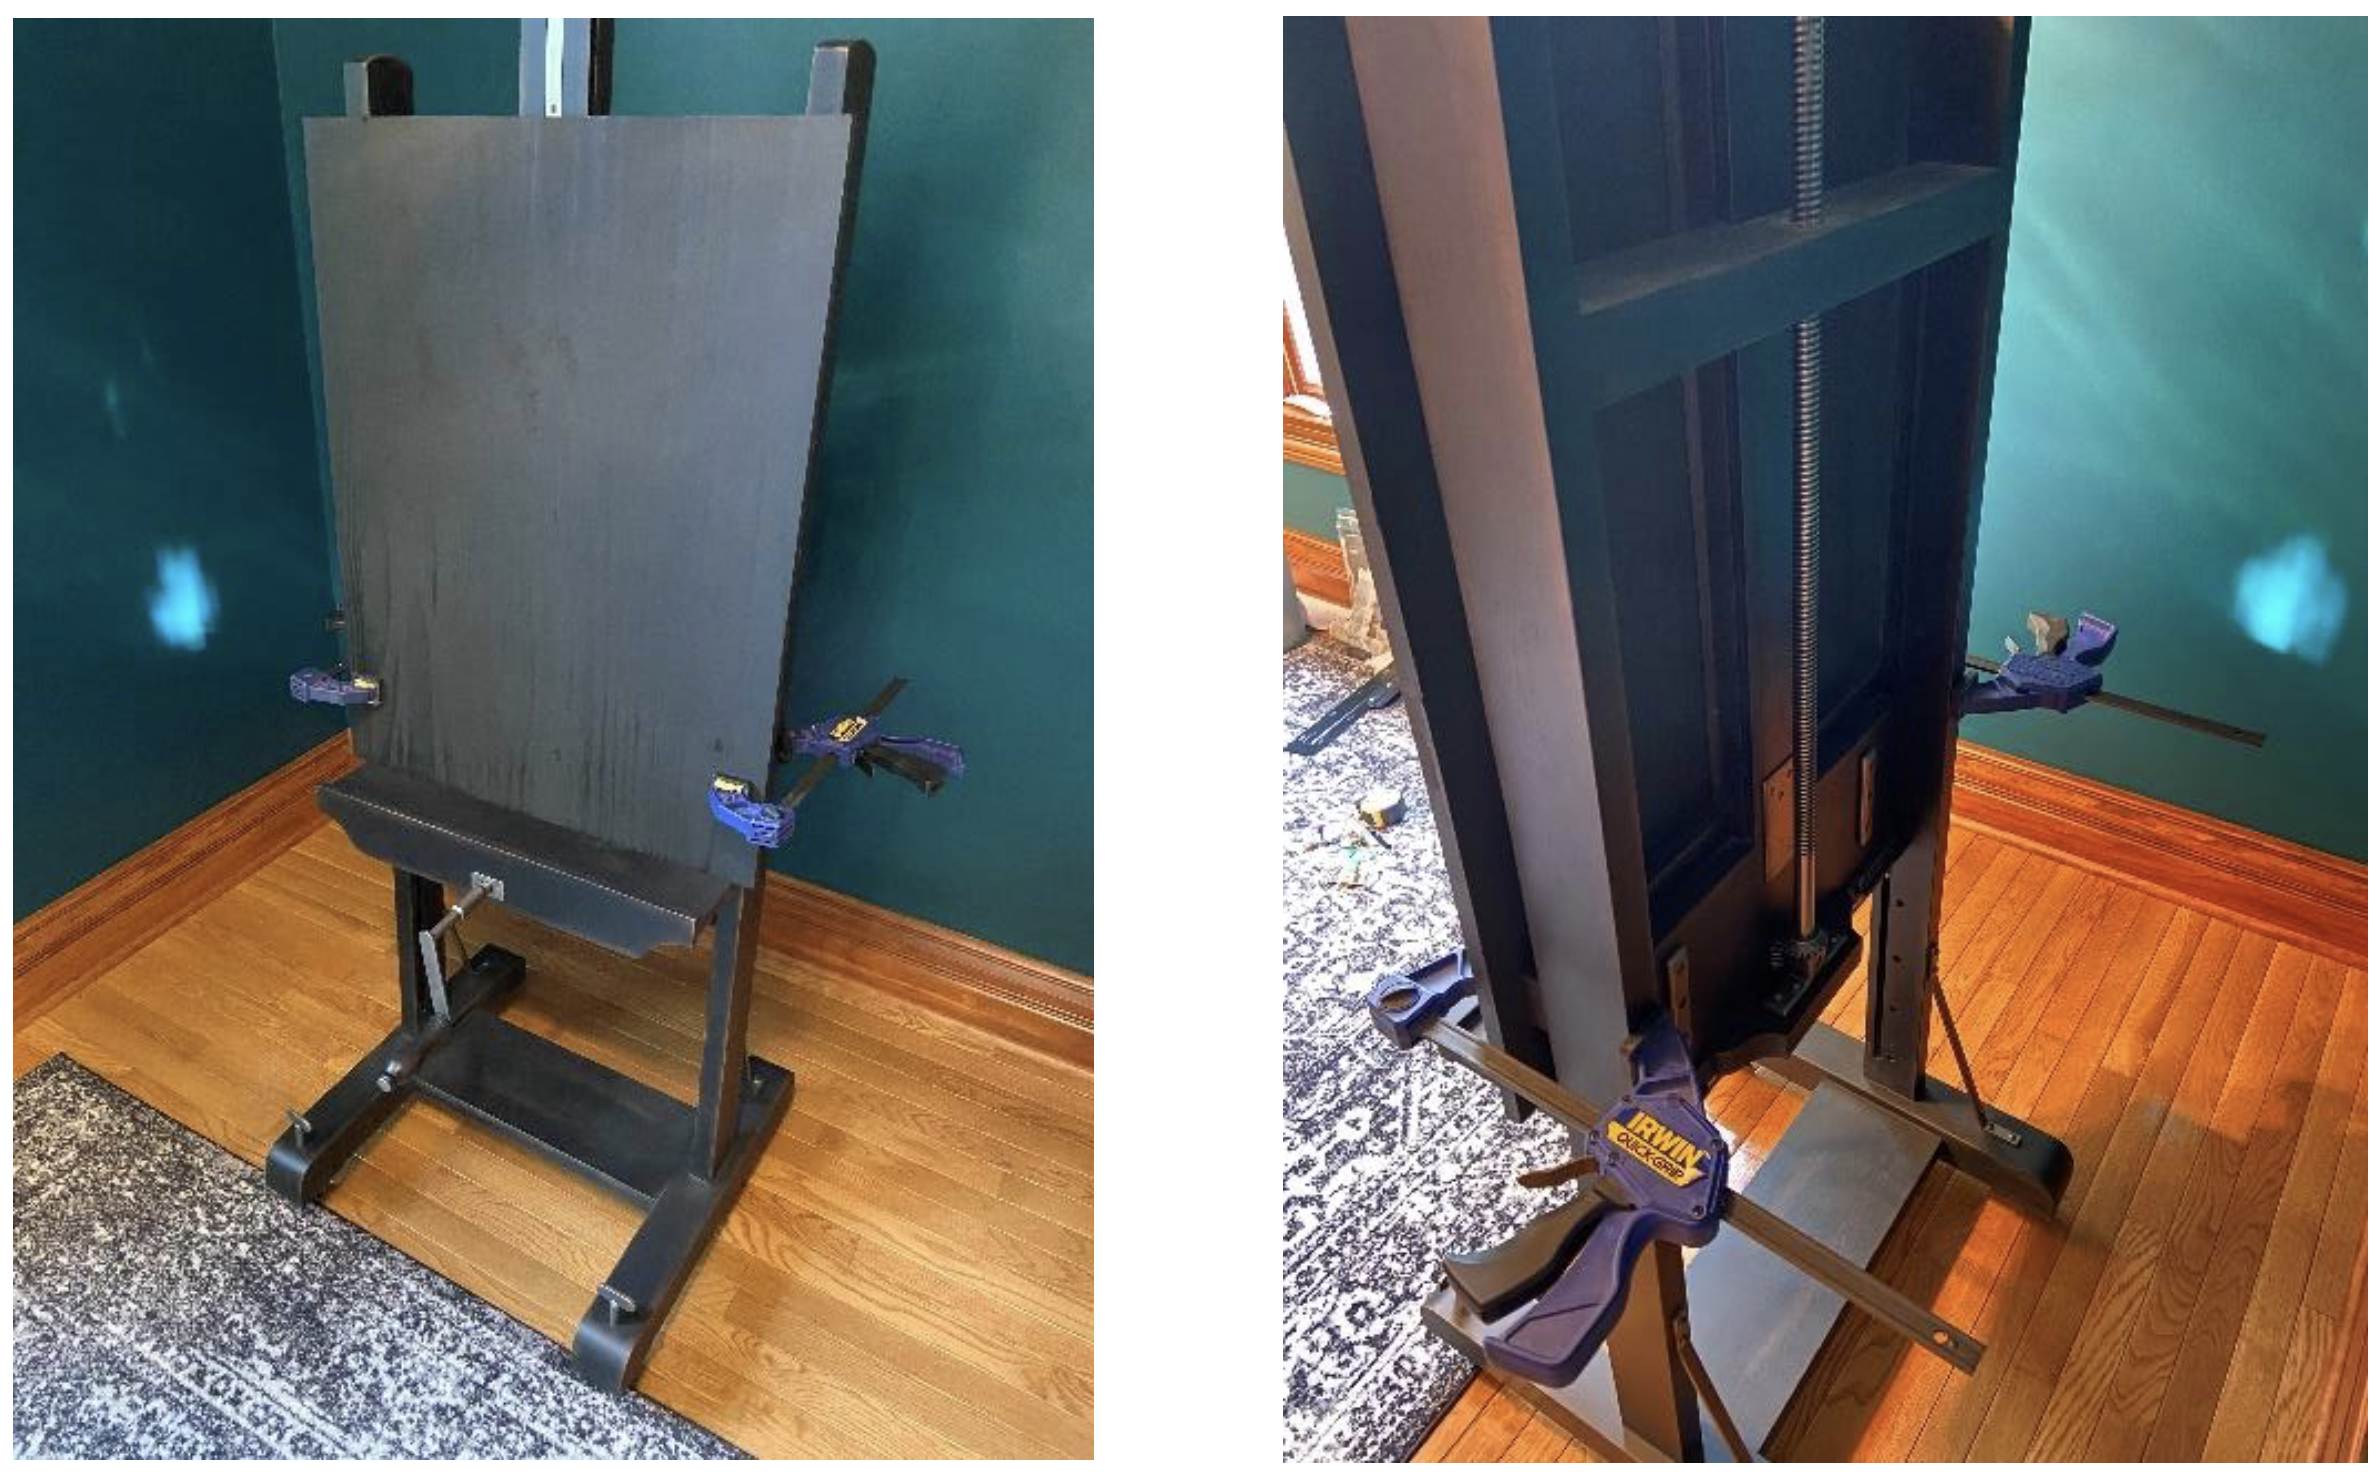
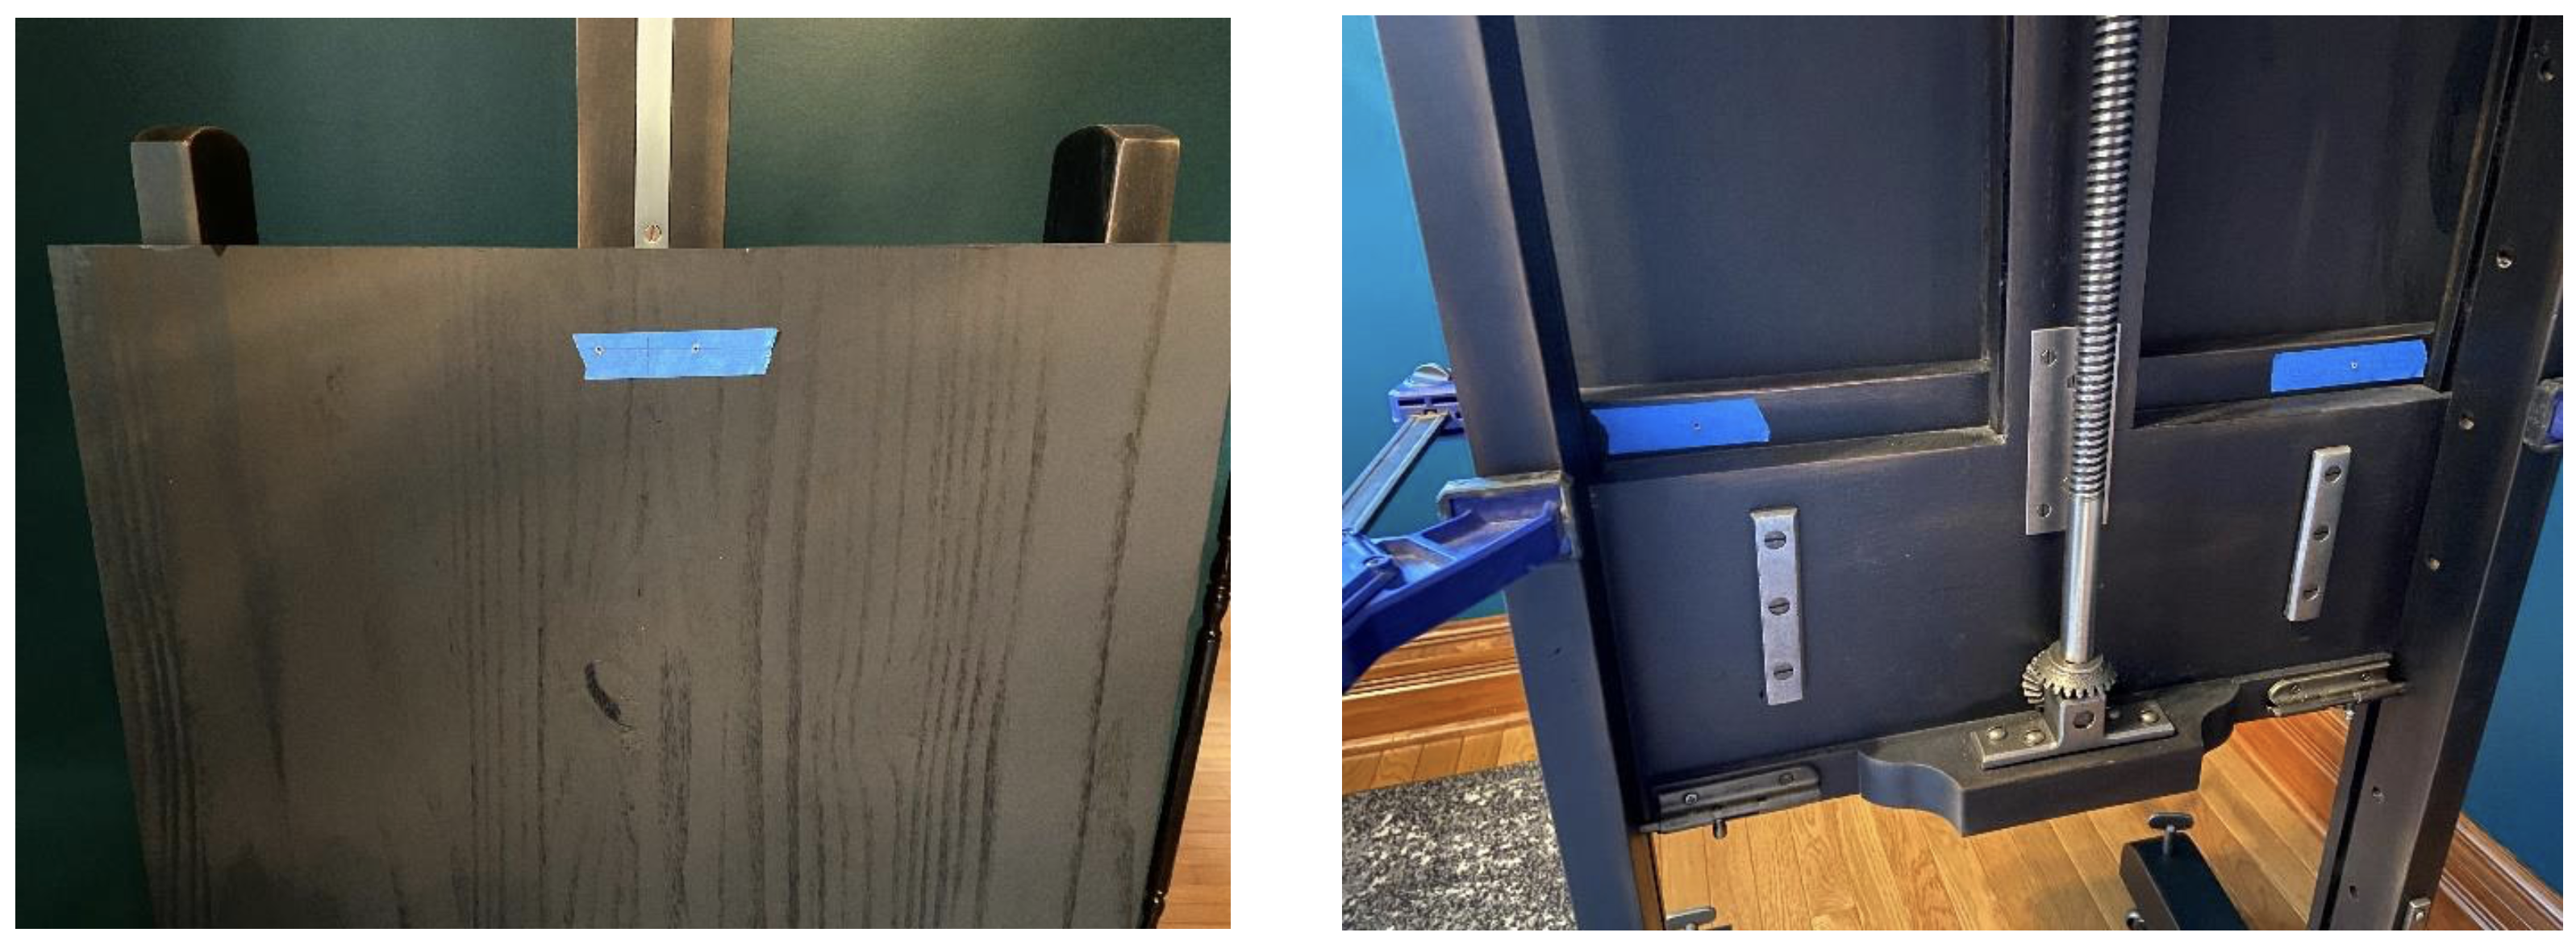
After cutting the board to length and painting it black to blend in, I used quick grips to hold it in place in order to drill pilot holes. Bottom of board rests on easel ledge intended to hold TV in order to help transfer weight.
Step 3: Pilot holes
- (2) Pilot holes were drilled at the top of the board into the easel beam. Holes were drilled 2” down from top of board and 2” apart (centered on width of board / easel beam).
- (2) Pilot holes were drilled through the horizontal piece of wood of the easel that contacts the new board. Holes were drilled 2” from left and right easel uprights. Holes in easel and board were enlarged to accommodate machine screws.
Step 4: Attach board to easel
Top of Board:

Bottom of Board:
Step 5: Secure TV mounting bracket to board
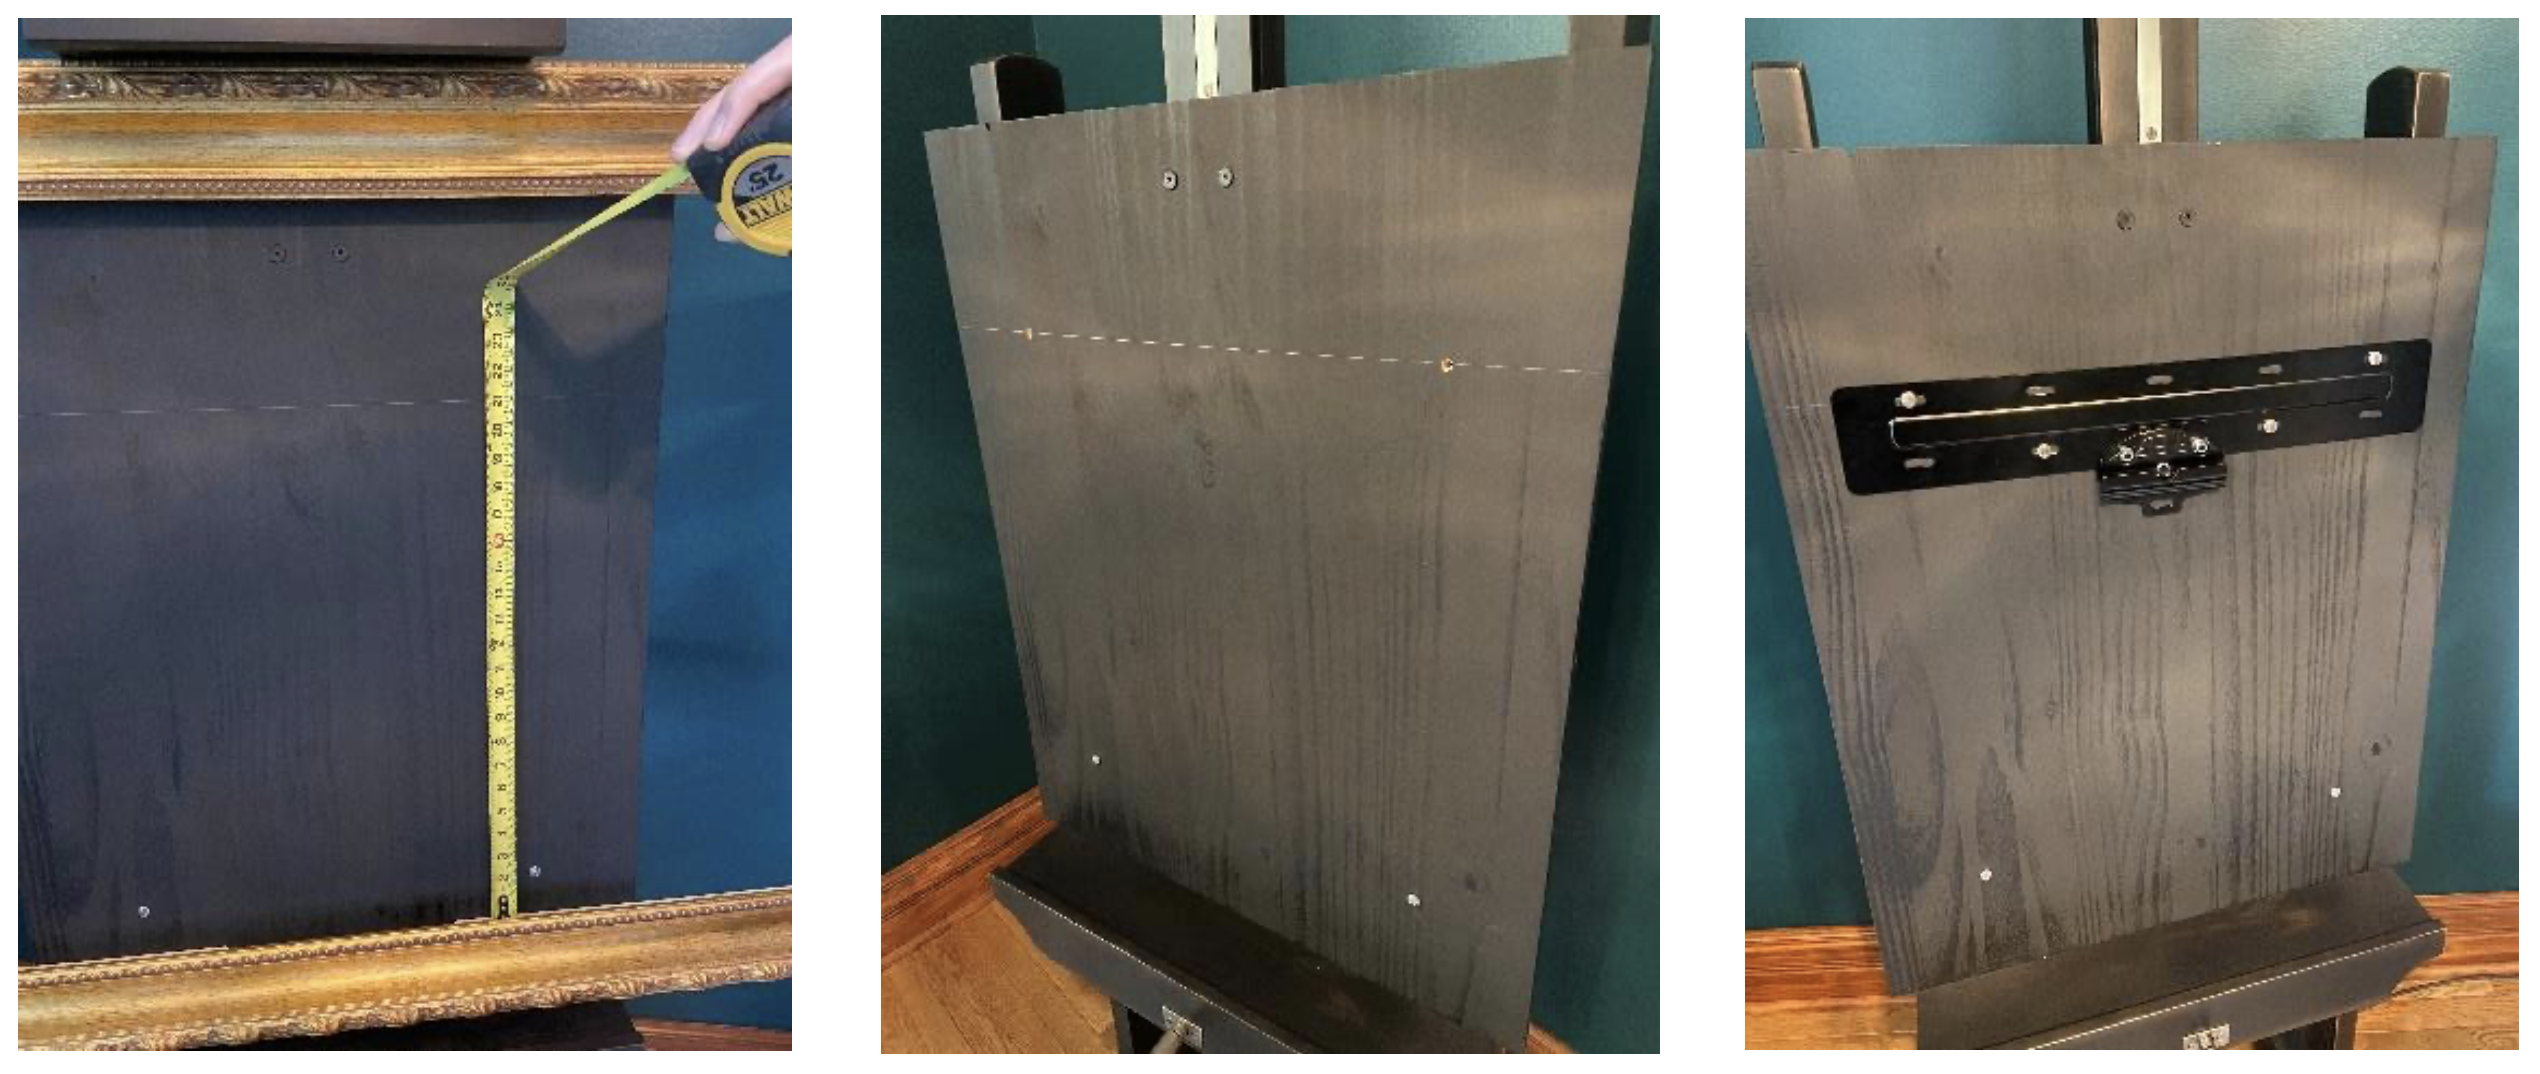
- I set the DECO TV Frame on the easel ledge. I measured up from interior portion of the frame to determine height of holes for mounting bracket. Note: The height of holes is notated on the template for the bracket. In the instance of a 55” TV, the holes were 20.8” up. I went up an additional 1/8” in order to raise the DECO TV Frame off the easel ledge when secured to the TV. (4) Holes were drilled for bracket. Bracket was secured with machine screws, flat washers and lock nuts.
Step 6: Hang Samsung The Frame TV on bracket and attach the DECO TV Frame
Step 7: Enjoy
Also Compatible with Samsung Studio Stand
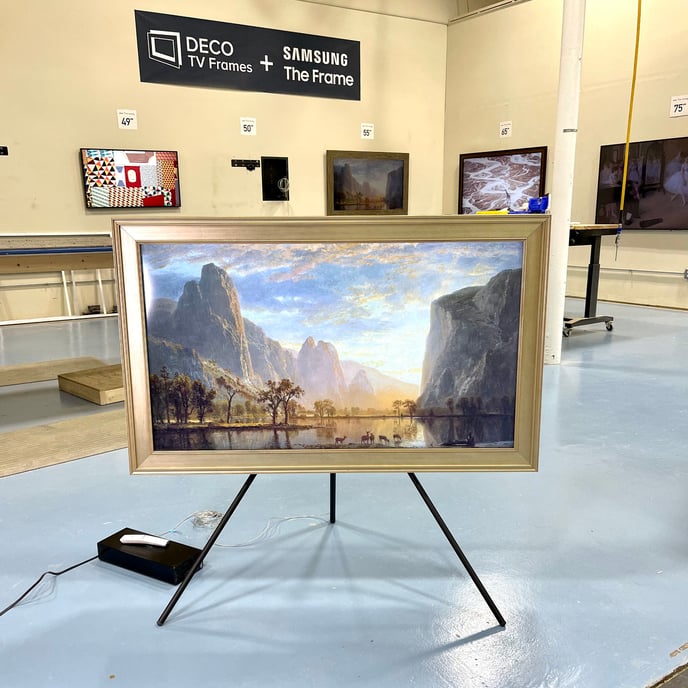 Even though the above is stunning, are you possibly looking for a lower cost solution than the Restoration Hardware easel? Or something that's not as much of a DIY project? Check out the Samsung Studio Stand for a quick easy lower-cost solution.
See the full video demonstration in our TVs On Easel highlight bubble on Instagram.
Explore the Full Collection of Deco TV Frames available for Samsung The Frame!
