
NOTE: "L Brackets installation method" is NOT to be combined with the "Straps Method". You would use one method or the other for installation. If your frame came with straps pre-installed, removed them first if you plan to use the L Brackets method.
Commonly used for:
- Mounting frame directly to the wall so the weight of the frame is not on the TV. Frames greater than 50 lbs. - Generally a TV Frame with TV Mirror for a TV greater than 50" diagonal screen size.
- Applications where the TV is surface mounted on the wall or protruding beyond the surface of a recess.
- Frame only or Frame with TV Mirror configurations
- Frame styles M1000-M9000
- Motorized Art frames where the TV is surface mounted on the wall.
When NOT to use this method:
- Motorized artwork frames where the TV is recessed in the wall.
- Premium Hardwood Collection of frames
Remote Control Integration
If using one of our Infrared (IR) Relay Systems with your frame, you will wnat to install the IR Unit before installing the frame.
- IR-2 Instructions: Click here to view
WARNING: If you have any questions or concerns about the installation process of any of our products, DO NOT PROCEED! Contact 978-912-7200 before proceeding. Failure to properly install this system may result in serious injury or death.
Be sure to also review the information provided by your TV manufacturer and the supplier of the TV's wall mount to ensure the weight ratings and limitations of any devices directly associated by the installation of this product.
Set of L Brackets to be used for this surface mounted application.
Need to Order a Set of L Brackets?
COST: $29.99
Installation Process
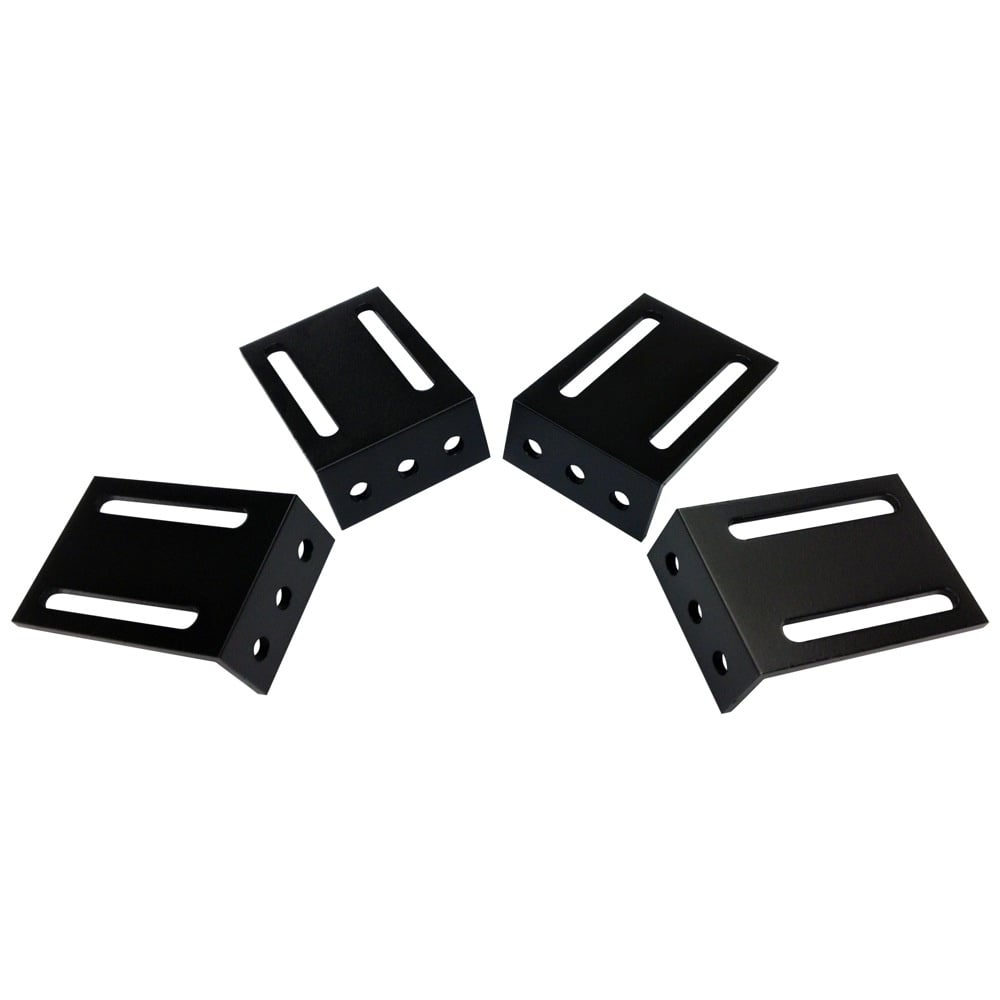
Figure 1:Set of 4 Surface Mount L Brackets.
Loosely pre-install the L Brackets onto the outer sides of the frame for test fitting in the next step.
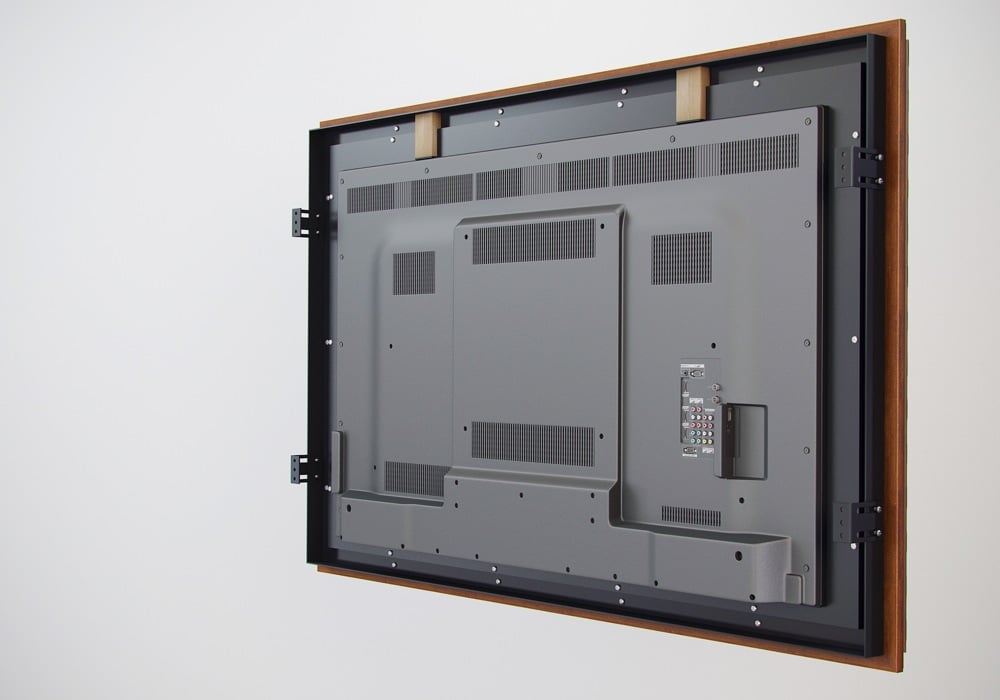
Figure 2: All 4 L Brackets loosely installed with frame.
Temporarily place the frame on the TV to determine location of where the L Brackets should be installed.
Mark the wall with a pencil to identify where the L brackets will meet the wall.
Repeat wall marking for all 4 L Brackets
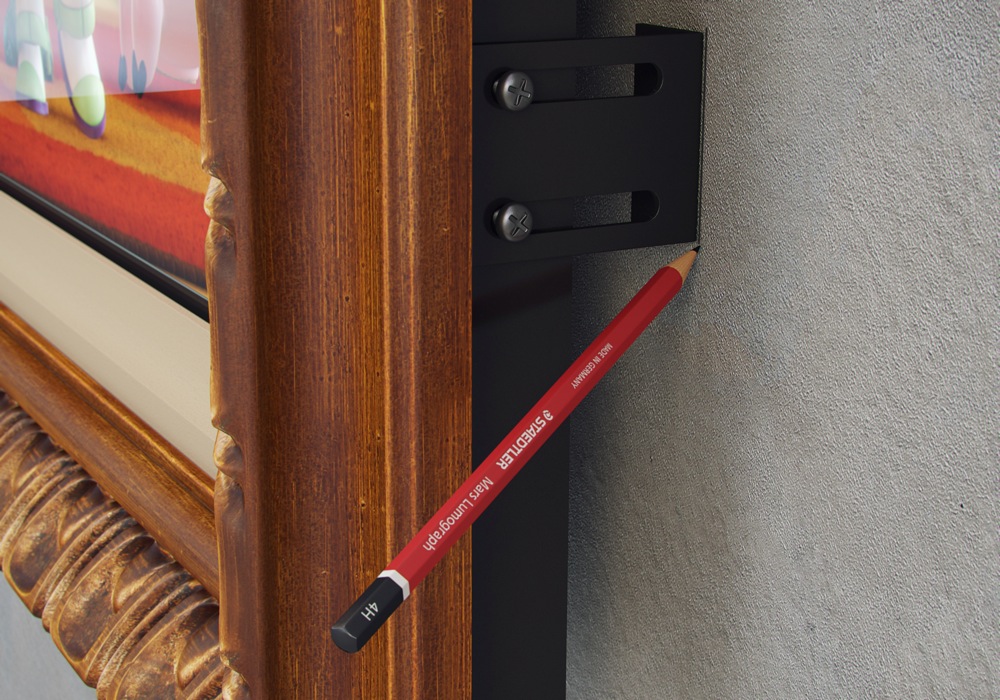
Figure 3: Pencil mark locations of each of the L Brackets to align with holes on sides of frame
Install the 4 L Brackets on the wall at the four corners of the TV as shown. Only 1 screw per L Bracket is necessary (the extra holes are provided more for flexibility to decide which hole you want to use when trying to either anchor into a stud or avoid one)
Ensure the brackets are screwed into a stud for frames greater than 75 lbs.
For lighter frames you can just use the wall anchors to secure the brackets to the wall. The weight of the frame is distributed between the 4 L Brackets and the TV's wall mount.

Figure 4:Set of 4 L Brackets installed on wall surrounding TV.
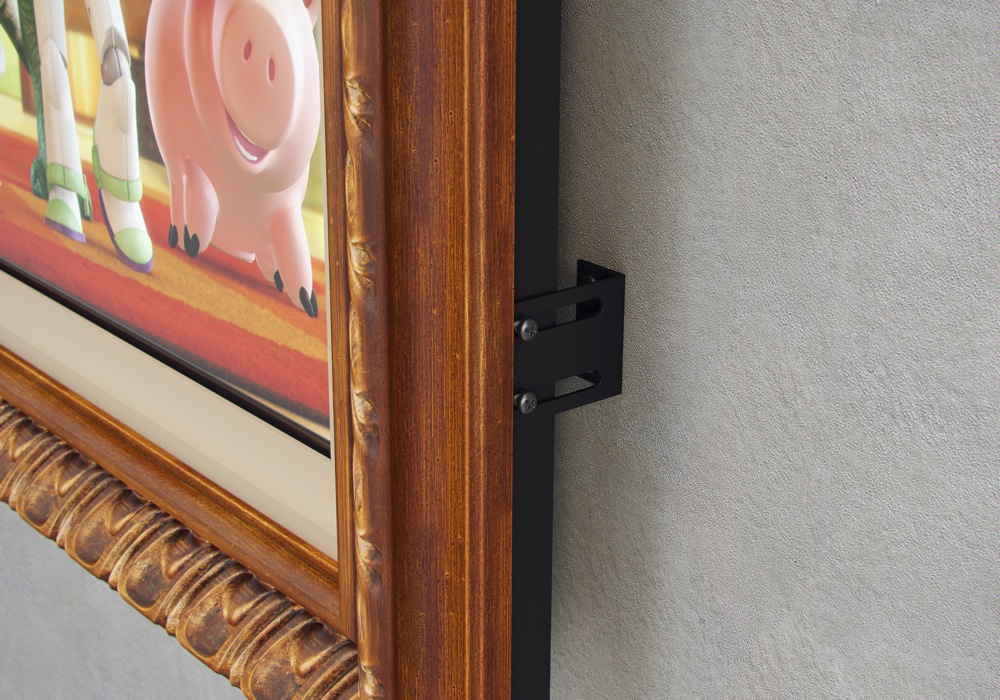
Hang the frame on the TV and secure the brackets to the outside sides of the frame using the provided screws. Notice how the slots in the brackets will provide adjustability for the frame based on the depth of the wall mounted TV.
The L Brackets are available in a variety of depths. Your frame has been shipped with the necessary depth based on your TV thickness. If you need a different depth bracket please contact Customer Service.
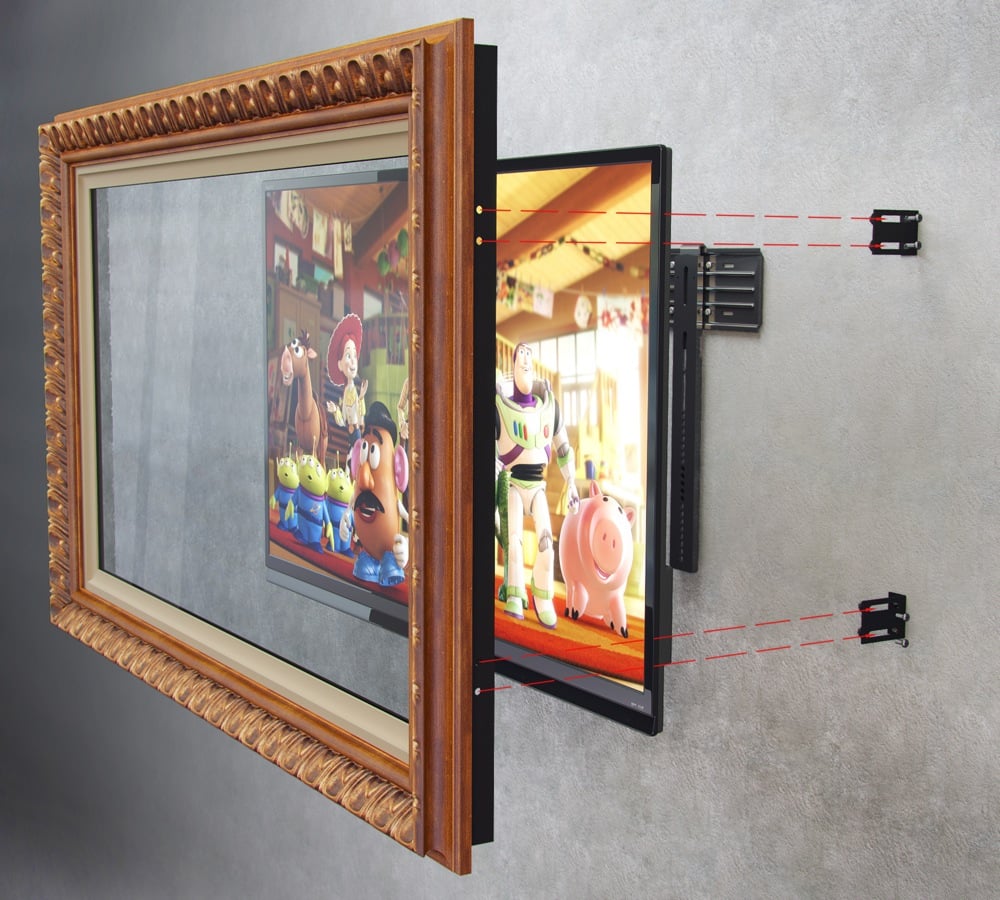
Figure 5: L Brackets alignment with TV Frame
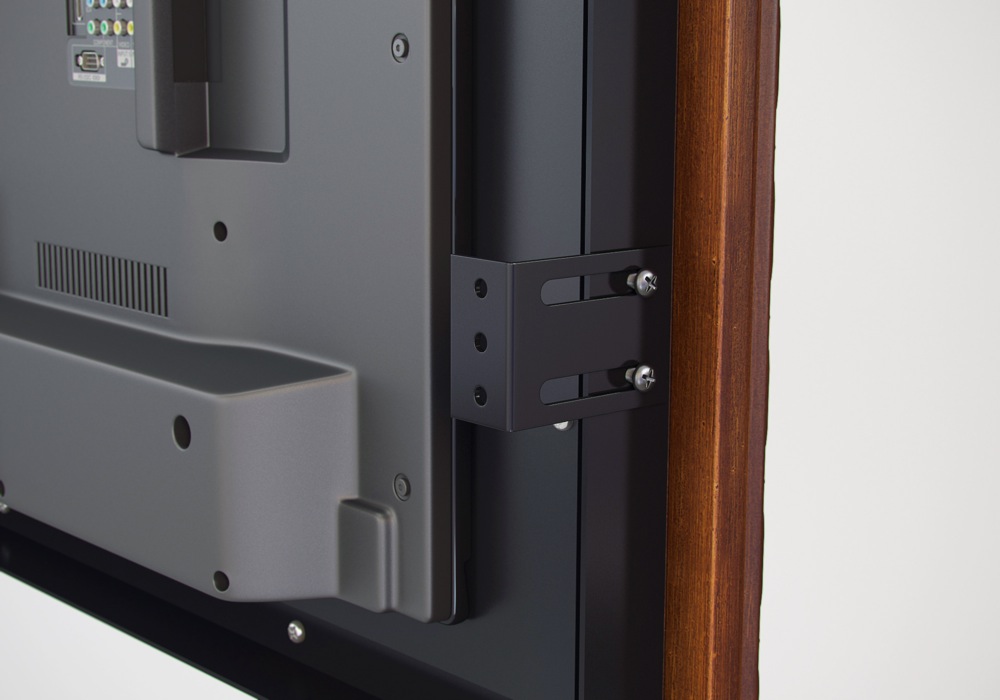
Figure 6: Exterior view of L Bracket installed in frame
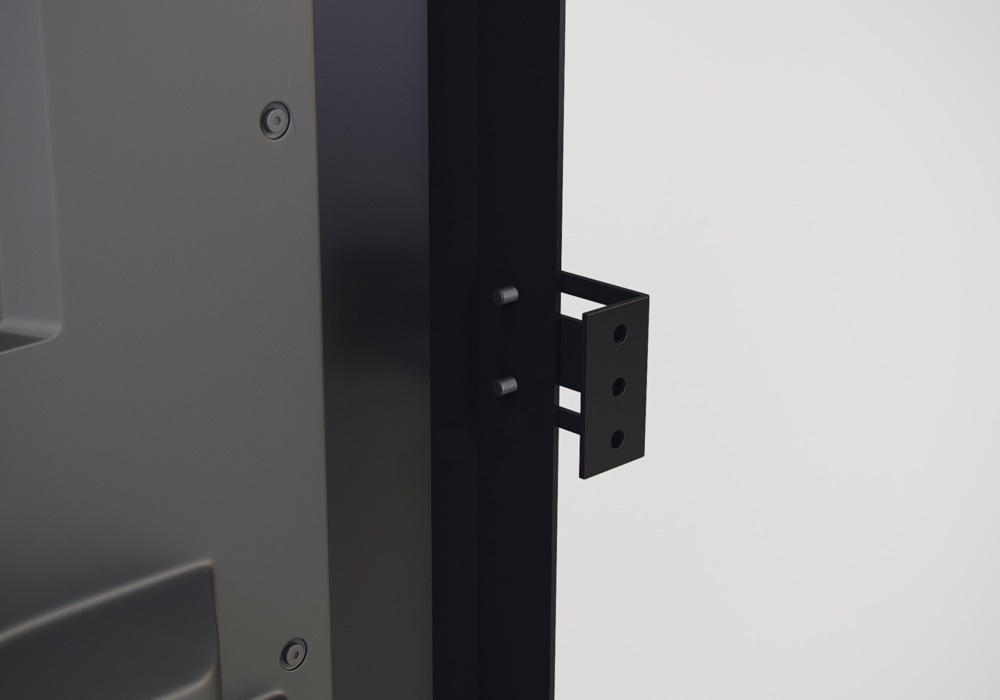
Figure 7: Interior View of L Bracket installed in frame.
Enjoy your new frame!
Figure 8: Final view of installed L Bracket. Can be further adjusted to be less visible for lower profile TV's and ultra thin TV Wall mounts.
Alternatively, to make the L Brackets less visible from the sides, this installation method can be performed by installing the L Brackets along the upper and lower sides of the frame using the same steps as above